
Cooling Tower Spring Start-Up
Industrial water treatment can be affected by seasonal changes, especially for comfort heating and cooling processes. When the outside weather is cold, boiler systems are used to provide steam and heat. When the outside weather is hot, cooling systems provide chilled water and dissipate heat. As we all know, time moves very quickly. The transition from heating to cooling season can be upon us very suddenly. This article is a reminder of various tests and control parameters associated with a cooling tower system.
Spring start-up of cooling towers requires sanitation per guidelines, careful monitoring of pH, oxidizers, and microbiological activity, and verification/calibration of all probes and handheld instruments. Use representative sampling and correlate inhibitor programs (phosphonate with molybdate/PTSA or drop count; confirm via UV digestion) while increasing frequency of tests during transition. Track both oxidizing and non-oxidizing biocide residuals, timing samples relative to dosing, and use ORP where appropriate to ensure effective control. Consistent recordkeeping and proper sensor care help prevent scale, corrosion, and biofouling and maintain compliant, reliable operation.
Key system factors
The cooling tower has been off-line all winter. Now, this very big air-scrubber is being started at a time where there is increased microbiological growth and activity. The American Society of Heating, Refrigerating and Air-Conditioning Engineers (ASHRAE) Guideline 12-2000 recommends cleaning and sanitation for cooling towers which were drained and un-drained during the winter storage period. Both free chlorine and pH must be monitored during the sanitation period using commercial water test kits.
In some states, such as New York, the water quality including but not limited to pH, temperature, conductivity and biocidal indicators, must be manually measured and recorded at least three times per week. The microbiological levels must be measured at least once per week while the cooling tower system is operating.
If using on-line monitoring and control, water is now being circulated through the control loop which had been idle. Probe functionality should be confirmed in terms of calibration and accuracy. Automated water quality measurements must be properly recorded.
Phosphonate is a mineral scale and active corrosion inhibitor while molybdate and PTSA, a fluorescent dye system which is steadily gaining in popularity, are common tracers used in a cooling water system treatment program. In recent years, the use of filming amines in cooling towers and closed loop systems has increased.
Tests measure key factors of a water system’s quality and chemistry to make sure the treatment program is working properly. When taking water samples, it is important the sample represents the whole system and not a smaller, non-representative portion of the system. Improper handling can consume certain chemicals or introduce contaminants which affect tests and your response to the result. Key to a representative sample is flushing the sample line before you take your sample. This will clear out impurities or chemical concentrations at the sample point. Look for things like color, smell and quality (cloudiness or suspended solids). Was the sample line clogged? These observations can help direct your testing.
In-line/handheld monitoring
A typical cooling tower control loop will have numerous in-line probes or sensors. Common parameters are Oxidation Reduction Potential (ORP), PTSA, Conductivity and pH. The accuracy of the probes can be directly confirmed off-line using the appropriate calibration standards. When the system is on-line and you do not want to disconnect the probes, a properly calibrated hand-held device can be used to confirm the readings.
For each parameter, standard solutions which approximate the control point for a specific system should be used. Look at expiration dates on all standard solution which may be left over from last season. Allow enough time to re-stock products if any have expired. Typical standards are as follows: ORP = 200, 400 or 600 mV; PTSA = 100, 300 or 400 ppb; Conductivity = 100, 500, 1000, or 1500 µS; pH = 4, 7 and 10. Follow the equipment manufacturer’s calibration instructions.
As well, proper care of your sensors and equipment will ensure accurate readings and long probe life. ORP and pH meters, probes and electrodes are particularly sensitive. Proper storage is needed when they are not being used. Best practice is to use an electrode storage solution. Do not use DI water as a storage solution because it will permanently damage the electrode.
Inhibitor treatment program monitoring
The complex nature of phosphonates makes residual testing slightly lengthy and complicated. Many programs use a molybdate or PTSA tracer to correlate with the phosphonate system residual. Ultra-Violet light digestion is the most accurate phosphonate test however, the entire test may take 15-20 minutes.
A drop count test is much quicker, 2-5 minutes, but it is less accurate. It is excellent for on-site, easy and accurate phosphonate residual determination.
Single and multi-parameter colorimeters are commercially available which provide the most accurate molybdate control methods. PTSA can be directly measured using a special meter, fluorometer, in a matter of seconds.
For the emerging filming amine technology, test kits are available for each specific manufacturer of those products.
It makes most sense especially at seasonal start-up to employ a combination of test methods. For example, periodically and especially in the spring, use the UV lamp digestion method to confirm and correlate with the molybdate, PTSA or drop count method. Once you have established a solid correlation, use the quicker method for routine control.
Microbiological treatment program monitoring
As the spring weather gets warmer, the microbes/bacteria throughout the environment increase in activity and volume. When the cooling tower is put on-line, it begins to pull in large amounts of air from the surrounding environment. So immediately, it is imperative to monitor microbiological activity.
Be aware of when biocide additions are made and when samples are taken for analysis. Samples taken too close to a biocide addition will give false low MB results. There are several methods which can be used: dipslides, Biological Activity Reaction Tests (BART), test strips and Adenosine Triphosphate (ATP). The following is a quick summary of each:
- Dipslides — Used to monitor microbial presence in industrial and process aqueous fluids, including cooling towers. The test can be performed on-site, but requires an incubation period between 77°F to 95°F (25°C to 35°C) for 24-28 hours. Results are expressed in Colony Forming Units (cfu)/mL. The results of these tests can assist in the correct usage of biocides in industrial processes. Dipslides contain agar applied to a two-sided slide or paddle inside a vial attached to a cap. One side usually measures bacteria and the other fungi, yeast or mold. The cap is twisted off and the media dipped into a water sample.
- BART — Uses two devices (1) a floating ball, FID-floating interceding device, that restricts the entry of oxygen into the sample below (2) the use of a crystallized deposit of selective nutrients, which sits in the bottom of the tube and encourages the activities and reactions by a specific group of microbes. There are seven selective biodetectors which can be performed at room temperature. The time for each test in cfu/mL depends on the bacterial population.
- Test Strips — Flexible plastic strips to which nutrient-containing filter paper is attached. The test strip is dipped into a water sample and placed into a pouch.
- ATP — Present in all living organisms. The level of ATP in water can be measured when it reacts with the enzyme Luciferase providing an instantaneous number using a luminometer. An ATP pen containing a honey-comb rod is immersed into a water sample and placed back into the containment tube. Total ATP is extracted from all the cells in the sample, living and dead. Free ATP is extracted from only dead cells. The difference of Total minus Free are the living organisms in the system expressed as Relative Light Units (RLU). The ATP test is a good tool for determining the effectiveness of a biocide program.
In addition to measuring MB counts, the oxidizing and non-oxidizing biocide additions and residuals are monitored. Note when biocide additions are made and samples taken for analysis.
Oxidizing biocides such as chlorine and bromine (halogen) products can be consumed by system demand before there is enough “free” residual to react with microbes. The system demand can be created by suspended solids or organic particles. Therefore, the halogen residual measurement typically will include a “free” and “total” test. Especially in the spring, it makes sense testing often enough during initial oxidizing biocide treatment to understand how long (minutes) a “free” halogen residual is maintained in the cooling tower system. As well, an ORP sensor may be used in conjunction with the oxidizing biocide program. Be sure to calibrate the sensor to correlate with biocide treatment residuals. Free, combined and total chlorine can be measured using drop count, colorimeter, color disk or ampoule test kits. Detection levels range from 0.02 to 10.0 ppm.
Non-oxidizing biocides are fed based on system volume therefore, review this information with the customer before initiating your program. MB control and product performance depends on concentration levels or residuals. It is important to closely monitor and test for specific activity levels. Colorimetric, titrimetric and/or ampoule test kits are available for the following non-oxidizing biocides: Bronopol (0-50 ppm), DPNPA (5-20 ppm), Isothiazoline (0-7.5 ppm), MBTC (0-5 ppm), THPS (0-100 ppm), Quats (0-320 ppm) and Glutaraldehyde (20-100 ppm).
So, anticipate the change in weather and ensure the various tests associated with a cooling tower system are now a part of your routine schedule.

Cooling Tower Maintenance
Cooling towers are significant components in many commercial buildings and industrial facilities. While they keep spaces and process water cool, they’re also susceptible to fouling which can lead to inefficiencies and breakdowns. In addition to a properly designed chemical treatment program, an in-depth maintenance program will keep your cooling tower in working order all year.
Regular, proactive maintenance keeps cooling towers functional, efficient, and safe by preventing wear, optimizing heat transfer, and reducing Legionella risk. Key tasks include expert consultation, thorough inspections, OSHA-compliant lockout/tagout and confined-space practices, disinfection, and careful removal of scale, sludge, and biofilm from fill, basins, and heat-exchange tubes. Routine checks of airflow components, fans/gearboxes, and pumps—with proper lubrication—sustain performance and lower operating costs. Establish a consistent schedule (often twice yearly) and use water testing to guide treatment decisions.
The Importance of Cooling Tower Maintenance
A functioning cooling tower is essential to the HVAC systems and processes in your facility. With the proper, routine maintenance, you can ensure your tower is functional, efficient and safe throughout the year. Performance
Preventive maintenance of a cooling tower is the best way to catch potential problems before they cause excessive wear. Extended periods of wear can reduce your tower’s overall life span. A comprehensive maintenance program will help you identify issues and respond with immediate solutions, keeping your cooling tower functional for longer. Efficiency
Beyond preventing malfunctions, maintenance can optimize performance. When all components are clean and functional, your tower will cool your building precisely as needed. Fouled fill, blocked distribution nozzles, buildup or broken parts may cause your cooling tower to work harder to achieve the same result, leaving you with higher running costs. Basin fouling can lead to under deposit corrosion that can cause irreversible damage to the cooling basin. Safety
Open recirculating systems are a common area for Legionella and other pathogens to grow and proliferate. Maintenance programs should include cleaning practices that clear your tower of any potential deposits and build-up that provide an area for microbiological activity to flourish.
How to Maintain a Cooling Tower
Cooling tower maintenance requirements include several cleaning processes and areas to examine. Creating a defined maintenance process ensures that every scheduled procedure is effective. Work through the following steps on a regular basis.
1. Talk to the Experts
Refer to your system documentation and/or consult with the equipment supplier for unit-specific precautions and/or procedures. Consult your water treatment professional prior to adding any products to your system as undesired reactions could occur if incompatible products were to be introduced to the system.
2. Inspect the Tower
You should begin by taking some time to perform an inspection of the entire tower. This initial step can help you identify any areas that require immediate attention, such as cleaning or repairs. Your maintenance program will likely include the same basic steps every time, but the inspection will reveal which areas might need extra attention.
3. Follow Safety Procedures
The Occupational Safety and Health Administration (OSHA) has guidelines for handling lockout or tagout on hazardous energy sources. The pumps and fans in a cooling tower can lead to severe injury if they start-up during maintenance. Make share you follow the lockout procedures thoroughly so you can protect yourself while you work. It’s also vital to wear eye protection and respiratory gear during maintenance so you can protect yourself from any airborne bacteria. In many cases, a cooling tower will be considered a confined space. If this is the case, all confined space procedures should be followed.
4. Disinfect to Eliminate Bacteria
With the possibility of Legionnaires’ disease, disinfection should be a priority during every maintenance cycle. OSHA, the Environmental Protection Agency (EPA) and the Centers for Disease Control (CDC) all detail how to handle the disinfection process for Legionella. Find a disinfectant product that’s effective on your tower surfaces. Many products are designed specifically for cooling towers and are able to kill up 99.9% of Legionella.
5. Remove Fill Deposits
Cooling towers remove heat through evaporation, which leads to scale buildup. The level of scale buildup will depend on the mineral levels in your water, and some types of scale can be more severe than others. The fill is an area that may foul over time. Since this surface area is primarily responsible for passing the air into the system and cooling the water, a clogged fill can lead to extensive performance and efficiency problems. Deposits on the outer edges of the fill (non-water contacting surfaces) can be caused by drift and evaporation. These deposits do not typically affect performance but can be unsightly and add weight to the tower fill. Extreme caution should be taken while cleaning tower fill. High-pressure nozzles can cause damage to the tower fill. This damage can affect the performance of the tower system and result in the need for fill replacement.
6. Clear the Basin and Other Components of Sludge
Sludge is another substance that often forms during the cooling process. It often appears in the basin, and it can be a major cause of performance issues. Cooling tower vacuums can help you remove sludge efficiently. In many instances, a pool vacuum can be used by creating a siphon to a roof or outdoor drain. Always make sure that the selected drain or drainage is approved for the water and debris being discharged. The water being discharged may have a pH, conductivity, or halogen level that exceeds the levels acceptable for the drainage.
7. Inspect and Clean Heat Exchange Tubes
Debris, scale and biofilm can build up in the tubes, causing fouling and reduced performance. Again, the buildup relates to your water quality, so your cleaning needs will vary depending on the type and amount of the substances found in your tubes and exchangers.
8. Check Airflow
If the airflow in your cooling tower is not up to standard, the performance declines. Loose parts, misaligned fans and failing gearboxes can all relate to airflow problems. Making sure these components are in working order will keep your tower functional.
9. Examine the Water Pump
The pump moves water back and forth — another process that’s essential to your cooling tower. Lubricating the water seal, bearings and pump can keep the system running efficiently, helping you cut back on operating expenses in the long term.
10. Keep a Regular Schedule
While you may not need to do an in-depth cleaning or repair process at every scheduled maintenance procedure, a consistent program is crucial. Twice a year is generally a reliable schedule, but you may need to do it more frequently if buildup occurs more often.
Find Water Testing Kits at AquaPhoenix Scientific
At AquaPhoenix Scientific, our water testing kits for cooling towers help you understand mineral contents and treat your water as necessary. Place an order for yours today or get in touch with us for more information.


Setting up a new laboratory requires careful planning. With the right new lab resources and an optimized layout, you can create a safe, efficient workspace. Reviewing a new lab resource guide and following helpful tips are excellent starting points for opening a new facility.
How to Set Up a New Lab
Setting up a new lab requires detailed planning, strategic investment in supplies and equipment, and strict adherence to regulatory standards. Whether your industry is water treatment, specialty chemical manufacturing or environmental testing, your new laboratory setup can significantly impact efficiency, safety, compliance and accuracy.
1. Design Your New Lab Layout For Efficiency
Focus on the following factors to ensure your laboratory’s layout supports efficiency:
- Workflow mapping: Reduce mistakes with a layout that minimizes cross-contamination risks. This is especially crucial for labs in the food and drug or medical industries. Use physical barriers, dedicated sinks and airlocks to separate sanitary and unsanitary zones if necessary.
- Traffic flow: Plan for high-traffic areas and sensitive instrumentation zones. Try to leave ample space in high-traffic areas, and plan to put equipment for delicate processes in less busy spaces.
- Ergonomics and safety: Place safety showers and eyewash stations close to workstations involving injurious corrosive materials. Workers will be able to reach them easily in the event of an emergency.
- Future-proofing: Design flexible spaces that can adapt as testing volumes increase. Modular furniture and portable equipment are easy to move if you need to rearrange spaces or add to your lab facility.
2. Implement Software
Choosing the right software for your lab is essential for boosting efficiency, protecting data, ensuring accuracy and streamlining regulatory compliance. Based on your lab operations, you may need one or all of the following software types:
- Laboratory information management system (LIMS): A LIMS is vital if you need to track samples. This is especially important if you operate a specialty chemical manufacturing facility that requires traceability.
- Inventory management: Inventory management software can help you track reagent expiration dates, which is critical for meeting safety standards and regulations.
- Reporting: Reporting software transforms manual, error-prone reporting processes into accurate, secure and streamlined workflows. This type of software is vital for compliance reporting. It automates Certificate of Analysis generation for customers.
Data integrity is crucial. You must ensure your software complies with your industry’s specific standards. For example, FDA-regulated sectors like tissue banks must comply with standards such as 21 CFR Part 11.
3. Develop Organization Systems
An organized lab boosts productivity, enhances safety and maintains quality. A well-organized lab minimizes clutter and reduces the time employees must spend searching for supplies. It also allows for easier scaling if you need to expand or change your lab’s layout in the future.
Focus on the following elements to develop an organized lab:
- Sorting: Sort your materials, tools and supplies, and designate a specific storage space for each item. This helps minimize clutter and makes it easier for employees to find what they need. It’s also important to inspect all of your old and new inventory to ensure everything meets your standards.
- Labeling protocols: Establish clear labeling for all containers, and standardize your lab’s labeling protocols to establish consistency. Proper labeling is crucial for compliance and safety in all sectors.
- Storage logic: Organize chemicals by compatibility. For example, acids and bases must be separate at all times.
- SOP development: Write standard operating procedures (SOPs) for every instrument and test method before your lab’s operations begin.
4. Gather the Necessary Equipment and Supplies
After sorting and organizing your existing inventory, it’s helpful to go through a checklist and determine what you need. These factors can help you stock your lab while keeping budget restraints in mind:
- Needs assessment: Distinguish between must-have and nice-to-have items before investing in new equipment or supplies. For example, compliance-critical supplies such as personal protective equipment (PPE) are must-haves, while efficiency-boosters like the latest testing equipment may be unnecessary when you first open your lab.
- Quality versus cost: While it may be tempting to save money with lower-cost supplies, investing in highly durable equipment provides a greater long-term return on investment.
- Vendor consolidation: Working with partners who can bundle hardware, reagents and consumables helps simplify procurement. Select a vendor that can streamline your ordering and restocking processes.
Specific needs vary by industry. It’s important to understand precisely what your lab requires for safe, smooth operations.

New Laboratory Checklist
Use this new lab checklist when taking inventory and determining what you need to order for your lab.
Chemicals/Reagents
Depending on your industry, you may need the following chemicals or reagents:
- ACS-grade/NIST-traceable reagents: If you operate a lab in the specialty chemical manufacturing industry, you will need ACS-grade/NIST-traceable reagents to meet safety regulations and quality standards.
- Bulk commodity chemicals: Bulk commodity chemicals such as hydrochloric acid, magnesium sulfate, solvents and salts are necessary in industries such as water treatment and food processing.
- Sanitation testing reagents: You may need food-grade or specific sanitation testing reagents for safe testing that prevents contamination and helps you comply with regulations.
Equipment
High-quality equipment powers your operations. Ensure you have the necessary equipment to perform the necessary functions.
- Sterilization: Equipment such as autoclaves, autoclavable bags and sterilization indicators are vital for sterilization procedures.
- Temperature control: If temperature control is important in your industry, you may need equipment such as baths, hot plates, hot plate stirrers, incubators or ovens.
- Cold storage: Cold storage equipment includes refrigerators, freezers, cryogenic supplies, ice makers and ice buckets.
- Separation and mixing: Separation and mixing procedures require centrifuges, rotors or adapters, shakers, stirrers, mixers and homogenizers.
- General equipment: It is also important to determine if your processes require general equipment such as freeze-dry systems, rotary evaporators, thermal cyclers, vacuum pumps or water purification systems.
Instrumentation
Instrumentation is just as important as equipment in lab environments. Ensure you have the necessary instrumentation for measurements, focusing on the categories related to your industry:
- Weighing: Balances, moisture analyzers, weigh dishes and spatulas are necessary for measuring the weight of materials.
- Electrochemistry: Meters, electrodes, probes and standards are important for electrochemistry measurements.
- Optical inspection: Optical inspection applications require equipment such as microscopes, slides, refractometers, spectrophotometers, cuvettes and colorimeters.
- General measurement: You must also determine if you need general measurement tools such as barometers, calipers, data loggers, hydrometers, timers and titration electrodes.
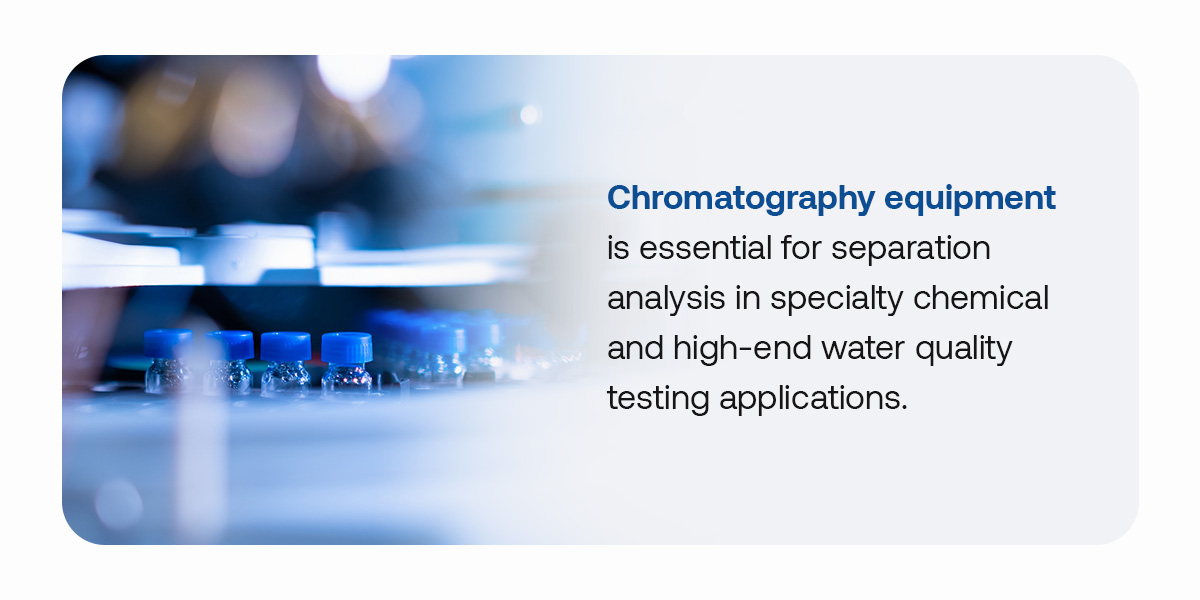
Chromatography Tools
Chromatography equipment is essential for separation analysis in specialty chemical and high-end water quality testing applications. If you plan to open a lab in one of these industries, you may need to invest in the following equipment types:
- Gas chromatography tools: Equipment such as gas chromatography columns, inlet liners, and flow meters is necessary for separating, identifying, and quantifying volatile chemical components in complex mixtures.
- High-performance liquid chromatography (HPLC) equipment: HPLC columns, lamps, tubing, valves and filter systems are necessary for analysis and purification.
- Miscellaneous chromatography equipment: Equipment such as flash chromatography media, solid phase extraction tools, syringes, and vials is also vital for analyzing and purifying various materials.
Furniture
A lab’s furniture makes up its foundational infrastructure. Based on your applications, you may need some or all of the following furniture:
- Cabinets: When choosing cabinets for a new lab, it is important to look for features such as chemical resistance, robust locks, spill trays and ventilation. You should also consider cabinet size and flexibility for potential future needs.
- Carts: Carts should be durable and compatible with the chemicals your lab technicians need to handle. They should also have safety features such as brakes and nonslip surfaces.
- Chairs or stools: Chairs and stools in a lab should be chemical- and spill-resistant for easy cleaning. Anti-static properties are important if you work with sensitive electronics. Features such as adjustable height, armrests and lumbar support are not necessary, but they can increase comfort for technicians who sit for long periods of the day.
- Countertops: Durability, chemical resistance, heat resistance, and easy cleaning are important properties to look for in laboratory countertops.
- Fume hoods: Fume hoods are crucial if your lab handles hazardous chemicals that produce toxic fumes, dust, aerosols or vapors.
- Drying racks: You will need drying racks if your lab technicians use glassware or plasticware that requires efficient drying without the risk of contamination.
- Shelving: Shelving units must be strong enough to hold your lab’s equipment and materials, and they should be durable and easy to clean. It is also a good idea to look for shelving with flexible configuration for ergonomics and potential layout changes.
- Sinks: Foot controls, proper drainage and durability are important properties of laboratory sinks. Stainless steel is a common lab sink material due to its chemical and heat resistance.
Life Science Supplies
Life science supplies are essential in tissue banks, the food and dairy industry and biological water treatment analysis. Depending on your application, you may need life science supplies.
- Cell culture: Cell culture media, antibiotics, serum and tissue culture tubes are essential for growing and maintaining cells in controlled environments.
- Electrophoresis and molecular polymerase chain reaction (PCR) supplies: You will need electrophoresis tools such as acrylamide, agarose, gel boxes, power supplies, and molecular weight markers if your lab technicians analyze DNA, RNA and proteins. It is also important to ensure your lab has DNA/RNA kits, PCR plates, TAQ polymerase, thermal cylinders, and restriction endonucleases.
- Immunology and microbiology supplies: If you run an immunology or microbiology lab, you will need items such as ELISA supplies, antibodies, microplate readers and washers, agar, and petri dishes.
Safety
Safety equipment is nonnegotiable for all sectors. Stock your new lab with safety supplies to protect workers and your facility.
- Safety apparel: Ensure you have enough lab coats, aprons and face or head protection for all lab technicians.
- Chemical storage: Safety cans and cabinets that can handle flammable or corrosive materials are important for preventing fires and damage.
- Emergency response: First-aid supplies, spill kits and eye wash stations protect workers in the event of an injury or contact with a harmful chemical.
- PPE: Stock your lab with PPE such as ear protection, gloves, safety glasses and respirators based on the potential risks associated with your application.
- Signage and labels: Safety labels and signage help ensure that your employees avoid risks and follow proper procedures while working.
- Radiation protection: Barriers and lead aprons are necessary if your lab technicians use radiation in their work.
- Hand hygiene: Ensure technicians have sinks and hand soap to maintain proper hand hygiene on the job.
Miscellaneous Supplies
You also need to make sure you have the daily supplies and consumables that keep your lab running.
- Glassware and plasticware: Glassware and plasticware, such as beakers, bottles, cylinders, flasks and funnels, are essential for handling liquids and solids.
- Consumables: You may also need consumables such as aluminum foil, bags, bench protectors, wipes and parafilm.
- Tools: Remember to consider tools such as clamps, Bunsen burners, crucibles, desiccators and tubing.
Tips for a Successful New Lab Setup
These steps can help you build a successful new lab from the ground up:
Prioritize Safety
Establish a safety culture from day one. Train lab technicians on proper chemical handling and storage, and place clear safety signage around your lab to ensure each employee understands proper procedures. You should also correctly label all materials and supplies before opening your lab.
Collaborate With Technicians
Involve lab technicians in the design process to ensure practical usability. Since technicians will use the lab daily for sensitive tasks, they understand their specific needs for safe, efficient workflows. You can consult with your employees on the best layouts and equipment positioning based on their usual routines, processes and traffic patterns.
Adjust Your Layout as Operations Change
Remain flexible as your lab grows. You may scale up production or expand test parameters in the future. When this happens, you might find that your lab needs a new layout to maintain safety and efficiency. Reevaluate your lab’s layout each year to determine if it still works for your operations. Make adjustments as necessary.

Find High-Quality Laboratory Furniture and Supplies From AquaPhoenix Scientific
Starting a new lab can present logistical challenges, but you can create a safe, efficient space with the right strategy. AquaPhoenix Scientific provides industrial lab supplies to help you design and stock your new facility. From furniture design to stocking your shelves, we offer fast service to help you transition to your new lab as smoothly as possible.
Our team is dedicated to going the extra mile. We tailor solutions to meet your exact needs and provide responsive support when you need it. Contact us to discuss your new lab project and learn more about how we can help.

The bottling industry operates behind the scenes of nearly every product we enjoy, from spring water and juices to pharmaceuticals and personal care items. Yet, most consumers rarely consider the amount of science, engineering and quality control that goes into ensuring every bottle is fit for purpose.
With rising consumer expectations, evolving health and safety regulations and the constant push for sustainable practices, the demands on bottle design and testing have never been higher. Quality assurance teams must balance compliance and innovation, all while minimizing the risk of costly failures. Each container must pass an array of tests and analyses before its journey even begins.
This guide dives into the principles of bottle testing, exploring why it matters, the risks it mitigates and the specialized tests that define container quality today. Whether you’re overseeing production, designing packaging or ensuring regulatory compliance, understanding bottle testing is key to delivering products that stand up to real-world demands.
The Role of Testing in the Bottling Industry
Before a bottle reaches a store shelf or a customer’s hand, it must withstand a range of rigorous tests. These testing protocols are essential for maintaining operational efficiency, meeting customer demands and supporting brand excellence.
Testing standards continuously evolve. Understanding the scope and purpose of container testing is fundamental for anyone involved in the production, distribution or oversight of packaged goods. The risks of inadequate container quality are high, including:
- Product spoilage and contamination: The primary function of any bottle is to protect what’s inside. Leaks from molding defects, insecure closures or improper seals can introduce external contaminants, rendering the product unsafe or spoiling the contents. Worse, chemical leaching can result in compounds migrating from the container’s material into the product, undermining quality and safety. These issues can destroy entire batches.
- Brand reputation damage: A single instance of product leakage or breakage can create negative publicity and erode consumer trust. Customers expect bottled goods to arrive intact and fresh, so they can enjoy the products they purchase with peace of mind. When containers fail, whether through cracks, bursts or faulty seals, companies may have to address complaints and initiate recalls.
- Regulatory and compliance failures: The bottling industry operates under stringent safety and quality standards. Governing bodies, like the International Organization for Standardization and American Society for Testing and Materials, set strict packaging and performance benchmarks. Regulatory compliance is mandatory. Failing to adhere to standards can result in hefty fines, product recalls, legal actions or failed market entry.
- Supply chain and profit loss: Every supply chain is vulnerable to container weaknesses. For example, bottles with low top-load strength may collapse under the weight of stacking during storage or transit, leading to breakages, leaks and product waste. These failures drive up costs by causing reworks and delivery disruptions.
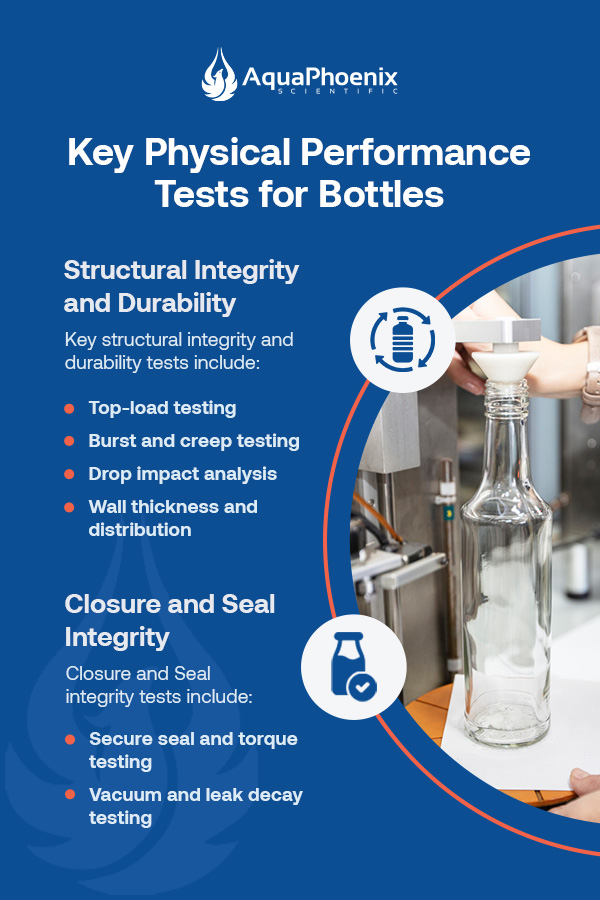
Key Physical Performance Tests for Bottles
Manufacturers use a suite of physical performance tests to mitigate risks and ensure quality. Each test aims to simulate the real-world stresses that bottles encounter as they transition from factory to consumer.
Structural Integrity and Durability
Bottles serve as protective barriers, but their performance is only as strong as their physical designs and construction. To guarantee that containers can reliably withstand the demands of real-world use, manufacturers rely on several mechanical evaluations.
These assessments aim to address everyday bottle hazards. They also allow manufacturers to understand bottle limitations to predict and prevent container failures.
Key structural integrity and durability tests include:
- Top-load testing: Top-load testing evaluates a bottle’s capacity to withstand vertical pressure. This test ensures bottles remain structurally sound even at the base of a fully loaded pallet. Insufficient top-load strength can cause container collapse, damaging the original bottle and the surrounding products and packaging.
- Burst and creep testing: Burst testing measures a bottle’s ability to endure elevated internal pressure, which is crucial for carbonated beverages or hot-filled products. In this test, the bottle is pressurized until it fails, determining the maximum burst threshold. Alternatively, creep testing examines how containers perform under sustained pressure over time. This test identifies slow deformation or failures, which help manufacturers anticipate problems during long-term product storage.
- Drop impact analysis: Drop tests simulate the shocks and impacts bottles may experience during packing, shipping or everyday handling. By dropping bottles from predetermined heights and positions, manufacturers can identify and rectify weaknesses. Sensors can be incorporated to measure the force of impact. Analyzing the resulting damage, from minor dents to complete rupture, helps manufacturers refine their designs and select more resilient materials.
- Wall thickness and distribution: Uniform wall thickness is an indicator of bottle quality. Areas with thin, uneven walls are natural weak points. Using specialized equipment, manufacturers can measure and map wall thickness throughout the container. This process aims to prevent unexpected breakage, especially in high-stress areas, such as the bottle base or neck.
Closure and Seal Integrity
A bottle is only as good as its seal. Even a perfectly formed container can fail if the closure doesn’t perform. The interaction between the container and its closure is crucial for maintaining product integrity, particularly during handling, transportation and storage.
Ensuring a dependable seal requires careful attention to both engineering and quality control. Closures must strike a balance between security and usability, preventing leaks while remaining user-friendly. Through targeted seal and cap performance testing, manufacturers can minimize the risk of contamination or spoilage.
- Secure seal and torque testing: This test evaluates both the application and removal torques of bottle caps or closures. The goal is a closure that’s tight enough to preserve freshness and prevent leaks, but not so tight that consumers struggle to open it. Consistent torque measurements ensure each bottle delivers the same experience.
- Vacuum and leak decay testing: Airtight seals are essential for preventing product contamination and spoilage, especially for perishable goods. Vacuum and leak decay testing involves creating a vacuum around the closure or applying pressure within the bottle. Results indicate any gradual loss of pressure or vacuum. These tests confirm that the closure system effectively prevents external air and microbes from entering the bottle.

Chemical and Barrier Property Analysis
Beyond mechanical strength, bottle materials must maintain purity and serve as effective barriers to external elements. At the molecular level, the effectiveness of a bottle depends on how it responds to surrounding chemicals, gases and moisture.
Sophisticated testing helps teams understand these interactions and validate that the chosen materials consistently meet performance expectations. By examining both chemical compatibility and barrier capabilities, manufacturers can confidently deliver products that stay fresh, safe and stable throughout their intended life cycle.
Material Safety and Composition
The material of the bottle is as important as the physical qualities. The chemical composition of packaging materials has a direct impact on product purity, consumer safety and regulatory compliance. As manufacturers seek performance and sustainability, understanding and controlling the ingredients and properties of container materials is more important than ever.
Material analysis confirms that bottles are built from the right substances and helps detect potential issues before they reach consumers.
- Migration and leachability testing: Migration testing determines whether any chemicals from the container can transfer into the contents. This test is especially relevant for plastic containers or those with coatings. Strict regulations, such as the Food and Drug Administration (FDA) standards for food-contact materials, govern these limits. Testing replicates worst-case scenarios, such as high temperatures or extended storage, to guarantee the bottle’s material is safe for intended use.
- Material identification: Material identification techniques, like Fourier-transform infrared spectroscopy (FTIR), verify that bottles are made from the specified and approved resins. Incorrect material grades can compromise safety, functionality or recycling compatibility. FTIR testing ensures each batch meets the manufacturer’s specification.
Barrier Performance Testing
Even trace amounts of air or moisture can compromise product flavor, nutrition, shelf life or safety. Advanced packaging creates a barrier that preserves quality and longevity. Barrier performance testing provides essential insights into this protective function. Products reach consumers exactly as intended, without unwanted changes or contamination.
Testing methods include:
- Oxygen and CO2 transmission: Some products, such as juice or beer, are highly sensitive to oxygen or need to retain carbonation. Oxygen transmission rate (OTR) and carbon dioxide transmission rate (COTR) testing measure how effectively the bottle can block these gases. Low OTR and COTR values indicate bottles that maintain product freshness and taste, while higher rates can lead to premature spoilage or reduced quality.
- Water vapor transmission (WVTR): WVTR testing assesses a bottle’s resistance to moisture transfer. Measuring and minimizing WVTR is critical for a wide range of product types. For dry products, high WVTR can allow humidity to spoil contents. For liquids, it may cause the product to lose volume or concentration over time.
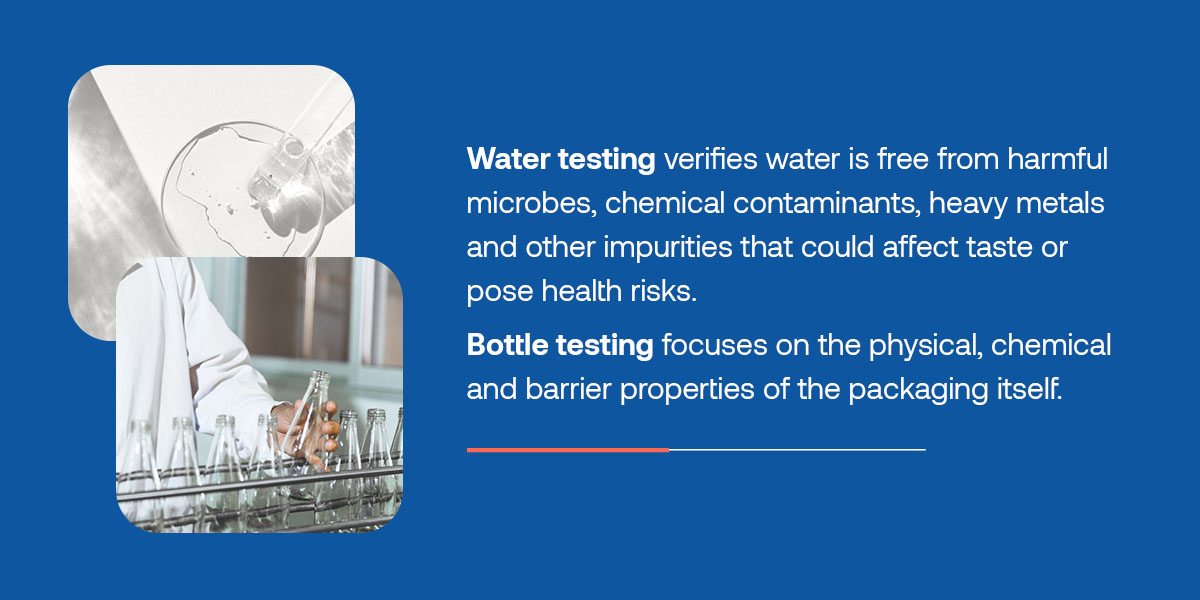
Bottle Testing vs. Water Testing: A Complete Quality Strategy
Water testing verifies water is free from harmful microbes, chemical contaminants, heavy metals and other impurities that could affect taste or pose health risks. Regulatory agencies around the globe, including the U.S. Environmental Protection Agency and the FDA, set standards to ensure bottled water and other beverages are consistently safe and high-quality. As a result, water testing is a core requirement for compliance and consumer trust.
However, even the cleanest, purest water can become compromised if the bottle that contains it isn’t equally reliable. This is where container or bottle testing comes into play. Bottle testing focuses on the physical, chemical and barrier properties of the packaging itself. It addresses crucial questions:
- Will the bottle protect its contents from outside contamination?
- Can it withstand the pressures and stresses of transportation and storage?
- Could any components migrate from the bottle material into the product?
These questions are central to preventing product spoilage, leakage or the introduction of unwanted substances.
Failures in bottle quality, whether through leaks, loss of carbonation, chemical migration or seal integrity, can cause product recalls, negative publicity and lost customer loyalty. Conversely, even a perfectly manufactured bottle can’t save a product if there are issues with the water inside. The two branches of quality control must work hand in hand to ensure the consumer receives a safe, pure and satisfying product.
An effective quality assurance program for the bottling industry should incorporate both water testing and bottle testing as integral components. Water testing in the bottling industry examines microbial and chemical composition, taste, odor, and compliance with local and international standards. Bottle testing includes assessments of structural strength, closure integrity, barrier performance and chemical safety.
By dedicating equal attention to both water and bottle testing, manufacturers can prevent a wide range of quality and safety issues before they reach the consumer. This dual approach also opens the door to meaningful innovation. Manufacturers can introduce new materials or processes without compromising safety or regulatory compliance.
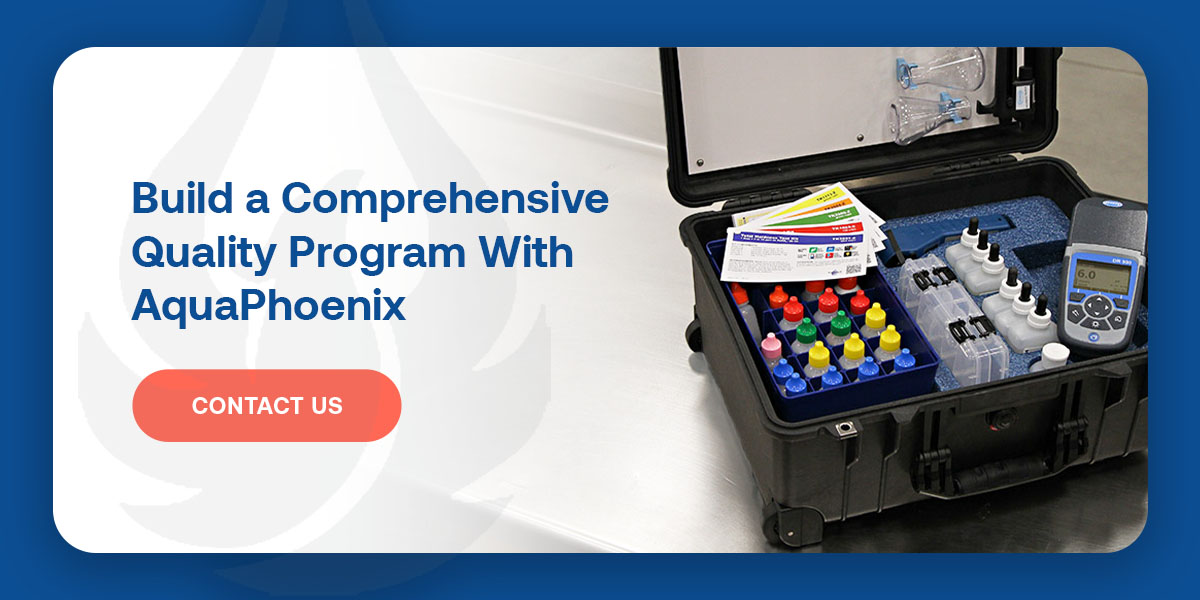
Build a Comprehensive Quality Program With AquaPhoenix
As the bottling industry evolves, maintaining the highest standards of container quality is a regulatory requirement and a competitive advantage. Comprehensive bottle testing helps manufacturers prevent costly failures, protect their brand reputation and ensure consumer safety at every stage. From verifying structural integrity and seal performance to assessing chemical compatibility and barrier properties, these tests are essential for delivering products that consistently meet both marketplace expectations and legal mandates.
However, implementing an effective quality program often requires customized solutions tailored to unique business needs. That’s where AquaPhoenix excels. AquaPhoenix offers end-to-end support with innovative test kits, custom packaging solutions and expert guidance designed specifically for the bottling sector.
Our services go beyond standard testing. We provide resources for research and development, inventory management, fulfillment and ongoing staff training to ensure your organization’s success. By partnering with us, companies gain access to personalized solutions that streamline testing, simplify compliance and support operational efficiency.
AquaPhoenix is your expert partner for a holistic quality assurance strategy. Develop a comprehensive testing strategy for your entire bottling process by contacting our team.

As global food distribution becomes increasingly complex and consumers demand more from their purchases, packaging should do much more than make products look attractive on store shelves. Today’s producers must design solutions that guard against damage, spoilage and tampering while also addressing sustainability, branding and traceability.
Achieving these goals requires more than innovative materials or eye-catching designs — it demands a commitment to rigorous testing and continual quality checks. Behind every successful food product is a packaging process rooted in careful evaluation, thoughtful material selection and thorough validation. This overview explores how comprehensive testing protocols ensure packaging serves its critical role.
Why Testing in Food Packing Matters
Modern food packaging fulfills two primary functions. It attracts consumers with appealing designs and informative labels while serving as the first line of defense against internal and external threats.
- Ensuring consumer safety by preventing contamination: Every year, food recalls due to contamination affect millions of consumers. Packaging is a barrier against contaminants, and proper testing ensures harmful chemicals from inks and adhesives do not leach into food. Scientifically validated testing can directly address risks such as microbial ingress, physical breaches and toxic leaching.
- Protecting brand reputation and avoiding costly recalls: Food recalls are expensive and can cause irreparable brand damage. Recalls often result in broken public trust, leading current consumers to turn away and dissuading potential consumers from trying new products. Testing significantly reduces the likelihood of packaging failures that result in unsafe products reaching the market, safeguarding public trust and your bottom line.
- Meeting complex national and international standards: Regulatory agencies worldwide enforce stringent packaging regulations. Regulatory agencies like the U.S. Food and Drug Administration and the European Food Safety Authority require organizations to meet compliance standards. Testing demonstrates this compliance with things like migration limits, labeling laws and material traceability to facilitate domestic and global exports.
- Verifying and extending product shelf life to prevent waste: Food waste is a significant global concern. Experts estimate nearly 1 billion meals a day end up lost or wasted. Improper testing or a lack of quality packaging contribute to food waste by increasing the likelihood of contamination and spoilage. Proper packaging can keep out moisture and oxygen, block UV light and keep food environments stable to ensure accurate shelf-life claims.

An Overview of Testing in the Food Packaging Industry
Risk management is the core of food packaging testing. Everything from raw materials to final, assembled packages must meet specific standards to pass regulatory scrutiny and meet consumer expectations. Each testing category targets distinct potential risks or failure points.
Material Safety and Migration Testing
A significant concern is the potential for chemicals to migrate from the packaging into the food. For example, residual monomers from plastics, inks from labels or plasticizers from sealants can contaminate food products. Testing for these elements involves several options.
- Gas chromatography: GC testing screens for intentionally added substances, such as adhesives, antioxidants and plasticizers. It can also identify non-intentionally added substances, especially when working with additional testing methods.
- Gas chromatography-mass spectrometry: GC-MS is highly sensitive, making it ideal for detecting various pesticide residues at trace concentrations. It can also quantify compounds like alkylphenols, styrene, bisphenols, phthalates and other volatile compounds that migrate from packaging to food.
- Liquid chromatography: LC tests analyze larger, less volatile compounds. Specific LC methods can assess the migration of additives, dyes or oligomers.
- Migration testing: Migration tests check for chemical leaching from packaging substances into food. This testing is pivotal because chemical migration can affect food safety, taste and integrity. Testing can be more specific, depending on the material you use.
Physical and Mechanical Strength Tests
Containers must endure various physical challenges throughout their life cycles. Food products undergo filling operations, transportation, retail display and consumer use. Physical and mechanical strength tests assess durability to ensure packaging can meet the demands of each environment.
- Puncture resistance: This test determines the packaging’s ability to withstand penetration from sharp objects, which is critical for avoiding breaches during shipping.
- Drop tests: These testing methods simulate accidental falls during production or distribution to assess whether the package can withstand the impact without rupturing.
- Compression strength: Stacked items must undergo compression testing to evaluate how much weight a package can bear before deforming or failing.
- Tensile and tear testing: These methods measure the force required to pull the packaging material apart or initiate a tear, indicating resilience during handling and storage.
Barrier Property Analysis to Prevent Spoilage
Effective packaging is a barrier that preserves food quality by blocking undesirable elements. Barrier property analysis assesses a package’s ability to perform this duty. This analysis occurs in specialized chambers that simulate real-world storage environments.
- Oxygen transmission rate: OTR indicates how much oxygen permeates the packaging over time. This measurement is crucial for products prone to oxidation, such as oils and snacks.
- Moisture vapor transmission rate: MVTR measures the rate at which moisture passes through a package. For hygroscopic foods, such as salt, grains and crisp foods, maintaining low MTCR is essential to shelf life.
- Light transmission: Sensitive foods like fruits and vegetables degrade in quality when exposed to bright light. Light transmission measurements ensure packaging can block or filter damaging wavelengths.
Seal Integrity and Leak Detection
Regardless of material durability, packaging with defective seals compromises food integrity. Seals must be tight enough to prevent liquid, air and bacteria ingress while allowing for consumer-friendly opening. Fundamental testing techniques include the following.
- Vacuum method ASTM D3078: The vacuum method involves placing the packaging underwater. As a chamber vacuum pulls external pressure down, air escapes through leaks and creates bubbles. This test is best for flexible packaging, such as packaging for dairy pouches, snacks or pet treats.
- Internal pressurization ASTM F2096: This testing method introduces air inside the submerged packaging. If a defect is present, air will escape as bubbles. Vacuum-sealed products benefit from this test method.
- Altitude simulation ASTM D6653: Products that travel through changing elevations, such as packages moving by air, should undergo altitude simulations. This test simulates pressure changes, revealing film stress points or package weakness in low pressure.
- Dry chamber testing ASTM D5094: This method uses sensors to detect pressure changes resulting from leaks. Liquid-fill containers often rely on this technique.
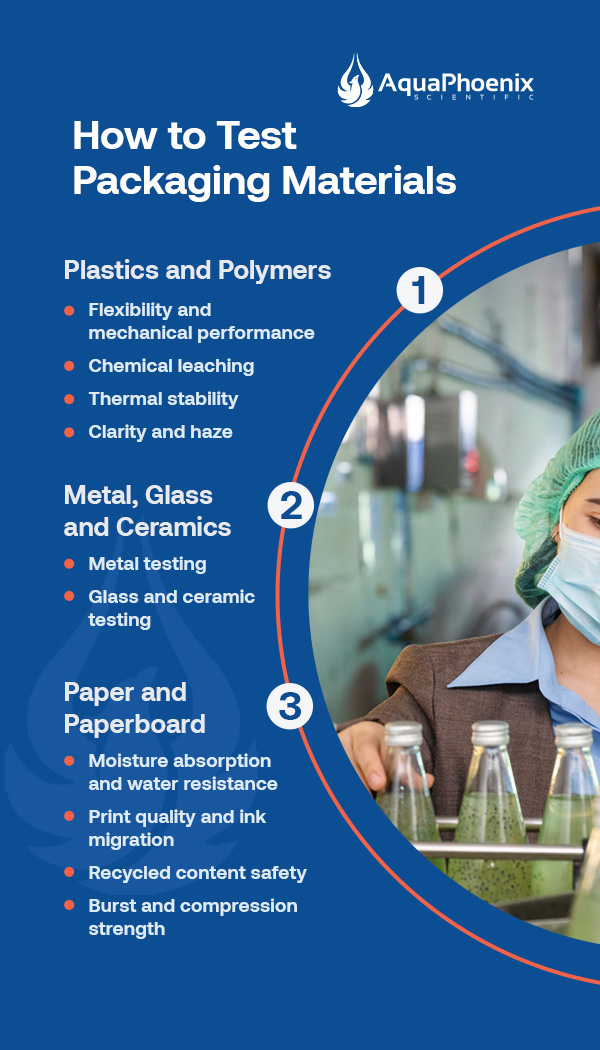
How to Test Packaging Materials
The food packaging industry uses various materials with unique characteristics, risks and regulatory considerations. Tailoring testing methods according to material type ensures they meet stringent quality and safety requirements.
1. Plastics and Polymers
Plastics dominate modern food packaging due to their versatility, lightweight nature and cost-effectiveness. However, safety concerns like chemical migration are paramount. Testing for plastics and polymers should assess multiple facets.
- Flexibility and mechanical performance: Measure tensile strength, tear resistance, elongation and impact resistance. Essential tests to assess these elements often take place at various temperatures to replicate cold-chain logistics and hot-fill processes.
- Chemical leaching: Regulatory limits set strict thresholds for chemical leaching. Migration testing focuses on additives, monomers and plasticizers and should take place at elevated temperatures
- Thermal stability: This testing ensures a material can maintain integrity and does not release harmful chemicals under heat exposure. Microwaveable containers must exhibit thermal stability.
- Clarity and haze: You must assess transparent packaging, such as bottles and wraps, for optical properties. Haze meters can detect cloudiness or imperfections that could result in diminished product quality.
2. Metal, Glass and Ceramics
Metals, glass and ceramics are favorite materials because they have exceptional barrier properties and immense durability. However, these materials have unique testing requirements.
- Metal testing: Metal testing assess structural integrity, corrosion resistance and the presence of coatings or linings. Compression, tensile and impact tests ensure the material won’t buckle, crack or dent during logistics. Corrosion testing leverages simulated environment exposures to assess corrosion susceptibility. Coatings or linings present on the metals should undergo testing for curing, residual migration and adhesion.
- Glass and ceramic testing: Glass and ceramics must undergo thermal shock, impact resistance and lead and heavy metal testing. Thermal shock testing assesses how well containers can handle rapid shifts between hot and cold, which is critical for processes like canning. Impact resistance tests, such as drop and ball tests, evaluate the ability to withstand handling accidents. Lead and heavy metal testing is essential for packaging with glazes and paints used in decorative finishes to ensure no toxic elements migrate into food.
3. Paper and Paperboard
Despite the shift toward plastics and metals, paper and paperboard remain essential for dry foods, frozen products and secondary packaging.
- Moisture absorption and water resistance: These tests measure how much water a material absorbs over a set period. This method is ideal for packaging that may encounter humidity or condensation.
- Print quality and ink migration: These migration tests evaluate whether printed materials bleed, fade or transfer onto food. These tests can also assess the migration of chemicals from printing inks.
- Recycled content safety: Paperboard with recycled content undergoes screening for residual mineral oils, chemicals and contaminants. These test methods typically include GC and GC-MS.
- Burst and compression strength: These tests ensure structural durability for stacking and transport.
Water Quality in Packaging Operations
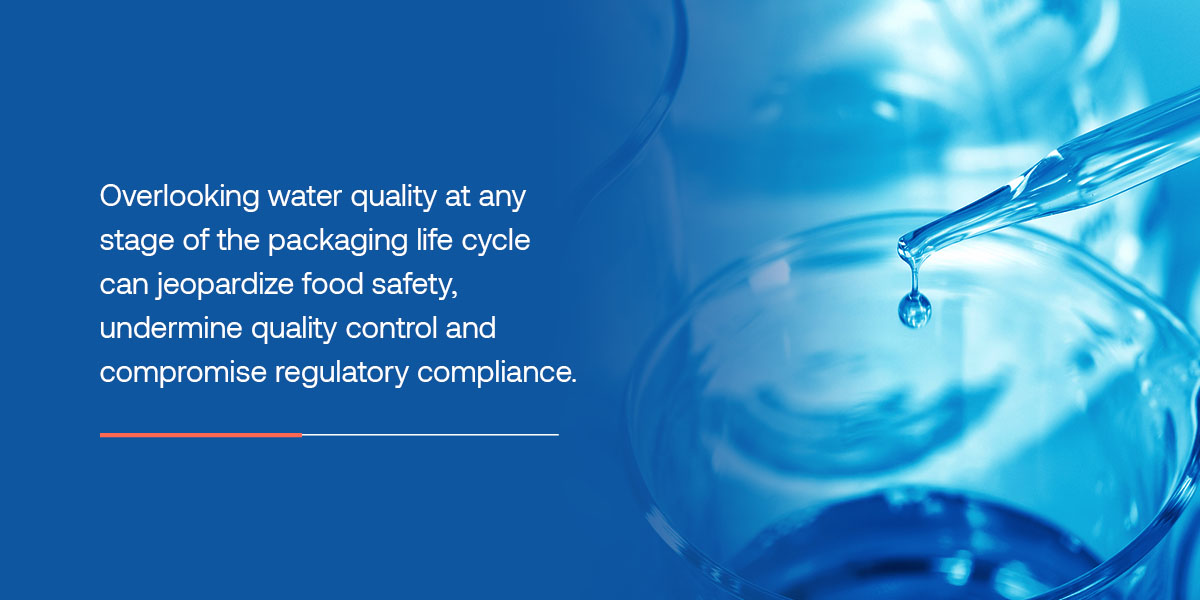
Water is an underappreciated but critical player in any discussion of food packaging safety and quality. Its influence reaches far beyond cleaning to affect every aspect of sanitation, ingredient testing and package manufacturing. Overlooking water quality at any stage of the packaging life cycle can jeopardize food safety, undermine quality control and compromise regulatory compliance.
Cleaning and Sterilization
Water is a universal cleaning agent in packaging plants. Equipment, surfaces and sometimes even the packaging materials undergo sanitization using water to remove dust, residues, adhesives or microbes that could compromise product quality. If water contains bacteria, fungi or chemical contaminants such as heavy metals or chlorinated by-products, these can migrate onto packaging surfaces, potentially leading to cross-contamination of food downstream.
For high-risk foods, such as ready-to-eat items, packaging often receives sterilization prior to filling. Techniques might use hot water, steam or water-based chemical sanitizers, all of which must be free of impurities. Waterborne contaminants could lead to spoilage, altered product characteristics or increased pathogen presence in packaged food.
Package Manufacturing
Teams often use water to process paper and paperboard packaging, in cooling systems for plastics and for applying adhesives and coatings. Impurities in process water can cause visible packaging defects, such as streaks, spotting and discoloration, interfere with adhesion or leave behind chemical residues that interact with food. In advanced polymer manufacturing, trace ions or organic matter in water can disrupt the precision necessary for specialty food-grade materials.
Testing Laboratories
Analytical laboratories depend on water of the highest purity. Any migration, residual or microbial test for packaging must use water that does not contribute to contamination in analytical readings. For instance, laboratory-grade water is essential for creating standard solutions, rinsing glassware, diluting reagents and directing sample extraction processes.
Water quality issues in lab testing can manifest in subtle and costly ways. For example, trace metals present in the analysis water can lead to false positives in heavy metal testing for packaging. Organic contaminants can also cause mass spectrometry “ghost peaks.” Even seemingly innocuous minerals like calcium or chlorine can interfere with migration testing by reacting with food simulants or test reagents.
Water Quality Parameters and Monitoring
Water is typically subject to strict monitoring regulations to ensure it is fit to use. Water testing parameters include:
- Microbial load, measured by total plate count or coliform testing
- Chemical content, including pH, conductivity and total dissolved solids
- Absence of specific impurities, such as heavy metals or volatile organic compounds
Packaging plants and laboratories often install water treatment systems ranging from filtration and reverse osmosis to ultraviolet or ozone sterilization. These require regular maintenance and validation. Documented water quality logs and periodic third-party testing ensure you can reliably meet all critical limits and regulatory requirements.
The Impact on Product Quality and Regulatory Compliance
Subpar water quality can also ripple throughout the packaging process, affecting the accuracy of regulatory compliance checks and product shelf life. If waterborne contaminants compromise packaging tests, invalid data may require costly retesting, potentially leading to noncompliance findings during regulatory inspections.
In summary, water quality control is integral to ensuring the safety, consistency and compliance of every packaging operation. Leading manufacturers and laboratories treat water as an operational utility and as a core ingredient in delivering packaging solutions that consumers and regulators can truly trust.
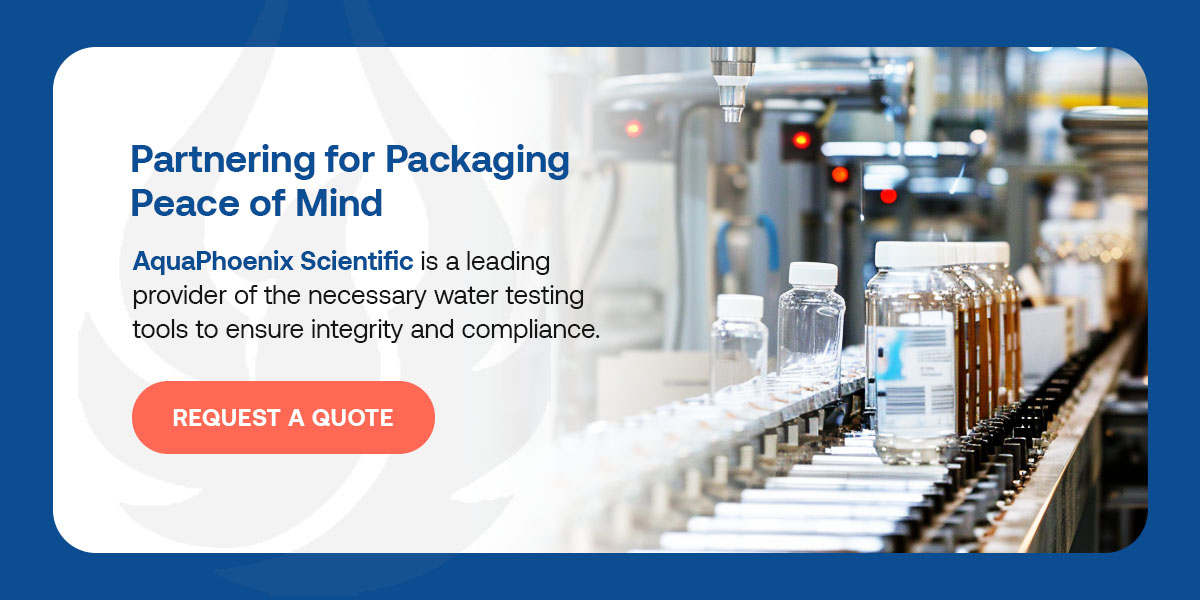
Partnering for Packaging Peace of Mind
Food packaging exists at the intersection of consumer safety, regulatory compliance and technological innovation. Rigorous testing ensures packaging fulfills its responsibilities as a physical and biological shield. However, poor water quality can compromise the most advanced packaging systems. From sanitation and sterilization to laboratory testing, water purity directly impacts reliability and results.
AquaPhoenix Scientific is a leading provider of the necessary water testing tools to ensure integrity and compliance. Our food and beverage test kits are suitable for all applications, from wastewater to sanitation. With our industry-proven solutions, you can confidently monitor water quality, uphold stringent safety protocols and support the full life cycle of your food packaging operation. Request a quote to discover how we can aid your operations.
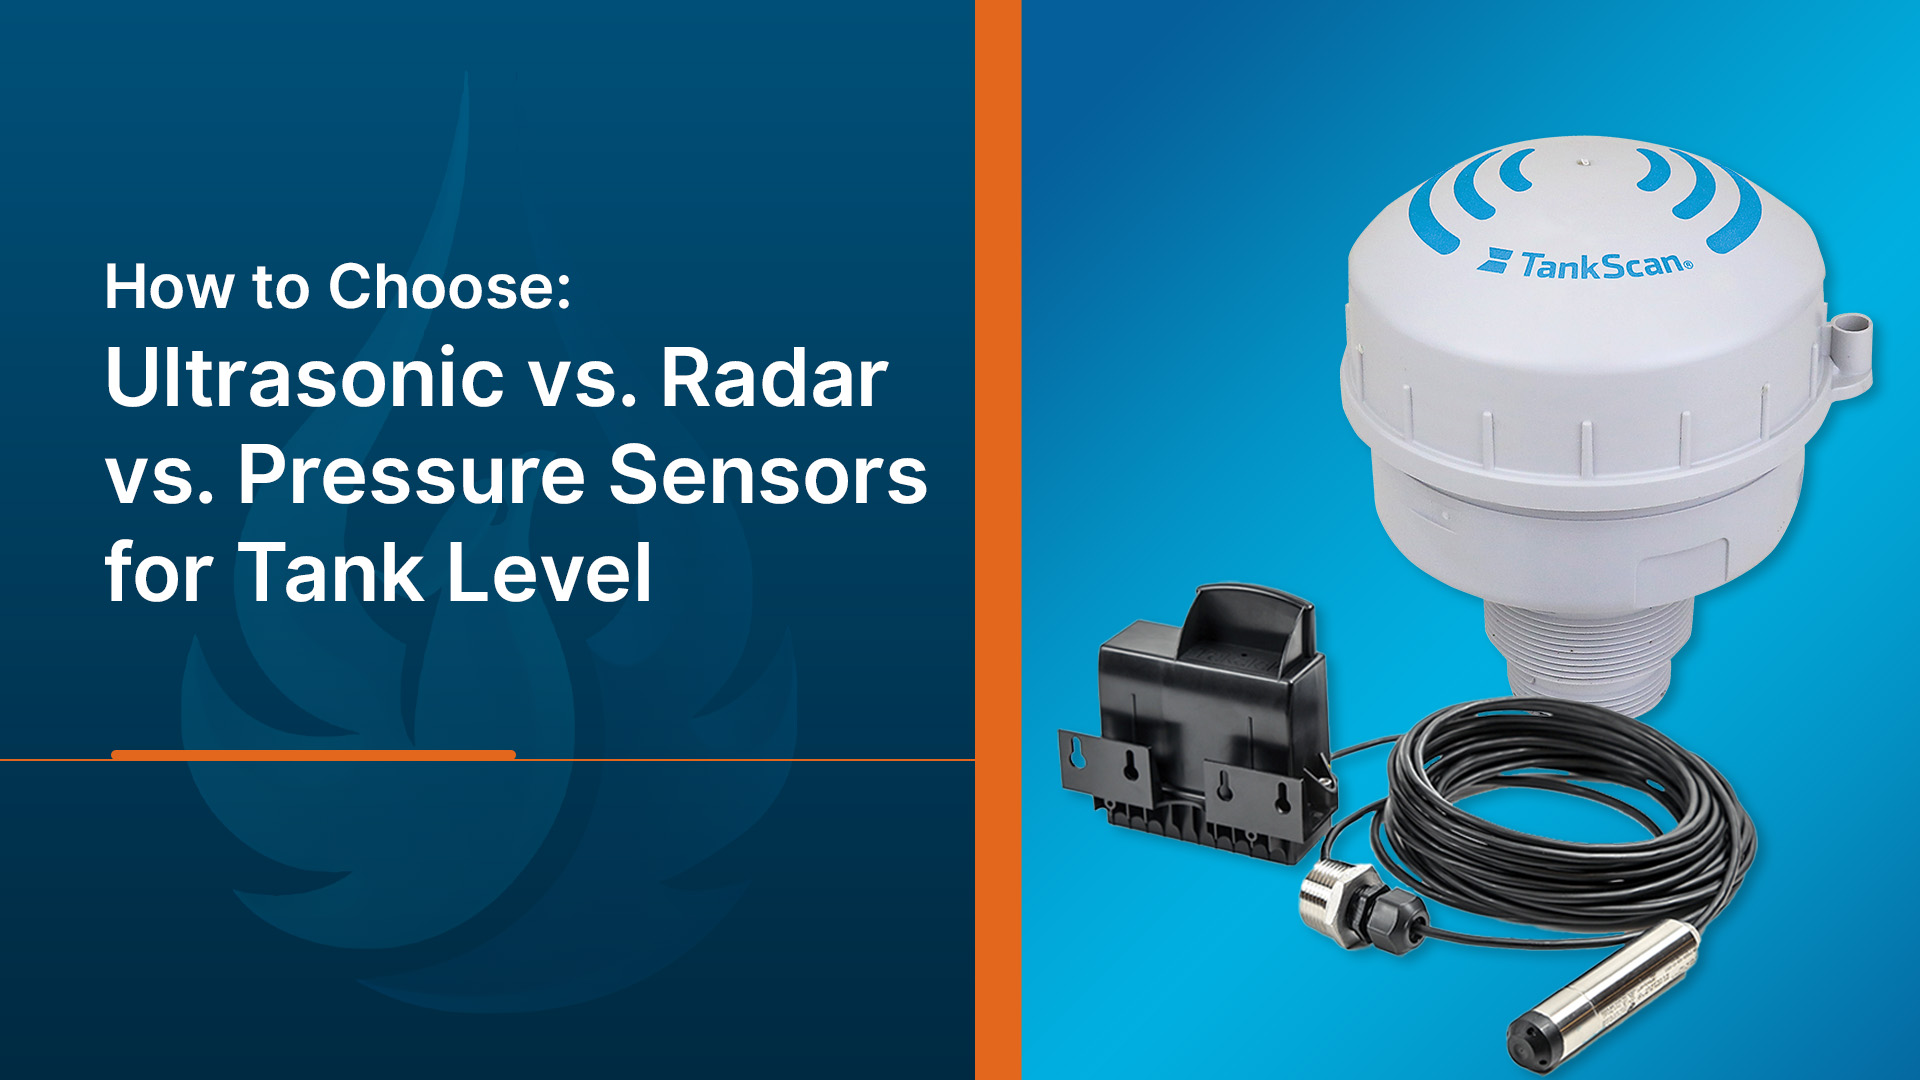
Accurate tank level measurement is the foundation of safe industrial water treatment. Miscalculating by only a few inches can result in wasted chemicals, equipment damage or serious safety risks.
While manual checks can be cost-effective, they’re prone to human error and inconsistent results. Investing in measurement technology protects your operations, optimizes resource use, reduces downtime and maintains compliance with safety standards.
The Importance of Tank Sensors
Tank sensors measure essential data for industries like chemical storage, feed or neutralization systems. Inaccuracies can lead to costly mistakes, including wasted products and unplanned downtime. Precise measurements ensure consistency, while protecting your budget and ensuring regulatory compliance.
On top of additional expenses and runtime, level accuracy directly affects efficiency and worker safety. Manual checks require workers to climb ladders and work around corrosive fluids. Eliminate these hazards with sensors that provide real-time, remote readings. With accurate and consistent data, facilities experience improved inventory management and reduced site incidents.
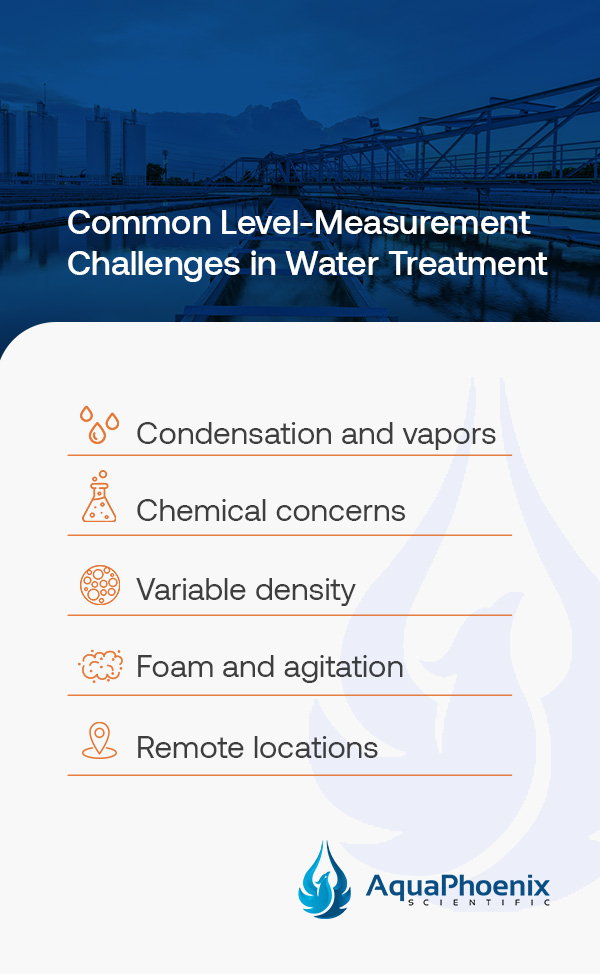
Common Level-Measurement Challenges in Water Treatment
Industrial water treatment systems deal with demanding conditions daily. Changing temperatures or chemical vapor exposure complicates measuring tank levels. Understanding these challenges helps you choose quality sensors.
- Condensation and vapors: Tanks often emit vapor, especially those with acids or caustic chemicals. This vapor condenses onto surfaces, impacting sensor readings and making them less accurate. More condensation equals extra maintenance and calibration.
- Chemical concerns: Many contact sensors perform well in clean water or mild chemical environments, but continuous contact with process fluids leads to corrosion. Compounds like sodium hypochlorite can attack metal diaphragms and seals, leading to failure.
- Variable density: Chemical dosing tanks may contain solutions that change density when mixed or diluted. Contact sensors become inaccurate if the density changes. Operators must recalibrate frequently or apply density compensation factors to ensure accurate results.
- Foam and agitation: Surfactants or aerated wastewater frequently produce foam. Ultrasonic sensor waves reflect off this agitation, resulting in incorrect levels. Facilities must use devices that are unaffected by agitated liquid.
- Remote locations: Relying on manual inspections or wired sensors at each location of a multisite water treatment system increases labor and travel costs. Wireless transmitters are essential for enhancing visibility across all locations.
Understanding Non-Contact Level Measurement
Non-contact sensors are some of the most widely used tools for monitoring tank levels in industrial water treatment. In contrast to submersible or hydrostatic sensors, which directly contact the liquid, non-contact devices use sound or electromagnetic waves to detect fluid levels from above the surface. This design eliminates contamination risks, corrosion and frequent sensor maintenance.
Ultrasonic and radar are types of non-contact sensors that determine the level by emitting a wave signal. Then, they time the signal’s reflection from the liquid and convert that travel time into a distance measurement.
How Ultrasonic Sensors Work
Ultrasonic sensors emit short bursts of high-frequency sound waves toward the liquid surface. The waves travel, bounce off the liquid and reflect to the sensor. The time it takes for the echo to return minus the speed of sound gives the device the liquid level.
Since ultrasonic measurement relies on sound waves traveling through air, it performs optimally in stable, well-controlled environments. Use it for measuring water and non-corrosive fluids in clean, still and obstruction-free plastic or fiberglass tanks.
Ultrasonic sensors are a low-cost, easy-to-install choice. They provide continuous data without physically contacting the liquid, so they’re ideal for tight spaces and monitoring water in stable environments.
However, since ultrasonic sensors use sound, they can lose accuracy when they encounter:
- Turbulence
- Dust
- Temperature changes
- High humidity
- Foam
- Condensation or vapor
- Wind and other noises
- Obstructions
How Radar Sensors Work
Radar sensors use microwave energy instead of sound for measurement. The sensor emits electromagnetic waves toward the liquid’s surface. These waves reflect to the transmitter, and you can use the return to calculate the distance to the liquid surface. Microwaves travel at a relatively constant speed, even in slightly varying air density conditions. They’re incredibly accurate in almost any environment.
There are two primary radar sensor designs.
- Non-contact radar sensors mount above the tank and send free-speed microwave pulses toward the surface. Use them for corrosive, viscous or hazardous fluids.
- Guided wave radar sensors transmit microwaves along a probe or cable that extends into the liquid, creating a more stable signal in turbulent or narrow vessels.
Radar sensors are precise, reliable and perform consistently, even when vapor or pressure changes interfere with other measurement tools. Changes in the dielectric properties of most process materials do not affect them. Their readings remain accurate even in different liquid compositions or temperatures. Use radar sensors for chemical storage tanks, corrosive fluids, pressurized vessels and outdoor installations. Radar can even measure through plastic and fiberglass.
The primary drawback is the higher up-front cost of radar compared to ultrasonic models. Some even require calibration for proper readings in complex tank geometries. However, modern radar designs make this technology much more accessible for water treatment and chemical applications.
Exploring Contact-Based Measurement
Contact-based sensors are another trusted option for tank monitoring. These sensors sit directly in the liquid, measuring hydrostatic pressure to determine fluid level. Contact-based sensors rely on physical immersion, so surface conditions don’t affect them.
Contact-based devices are stable and cost-effective in the appropriate setting. Choose them for underground tanks or wastewater pits where vapor is a concern. However, their constant fluid exposure means contact-based devices need materials and housings compatible with the liquid in the tank.
Hydrostatic pressure sensors are the most common contact technology. They convert the pressure exerted by the liquid above them into electrical signals. As the tank fills, the pressure reading increases, and vice versa. Facilities get a continuous level measurement that they can integrate into their monitoring systems.
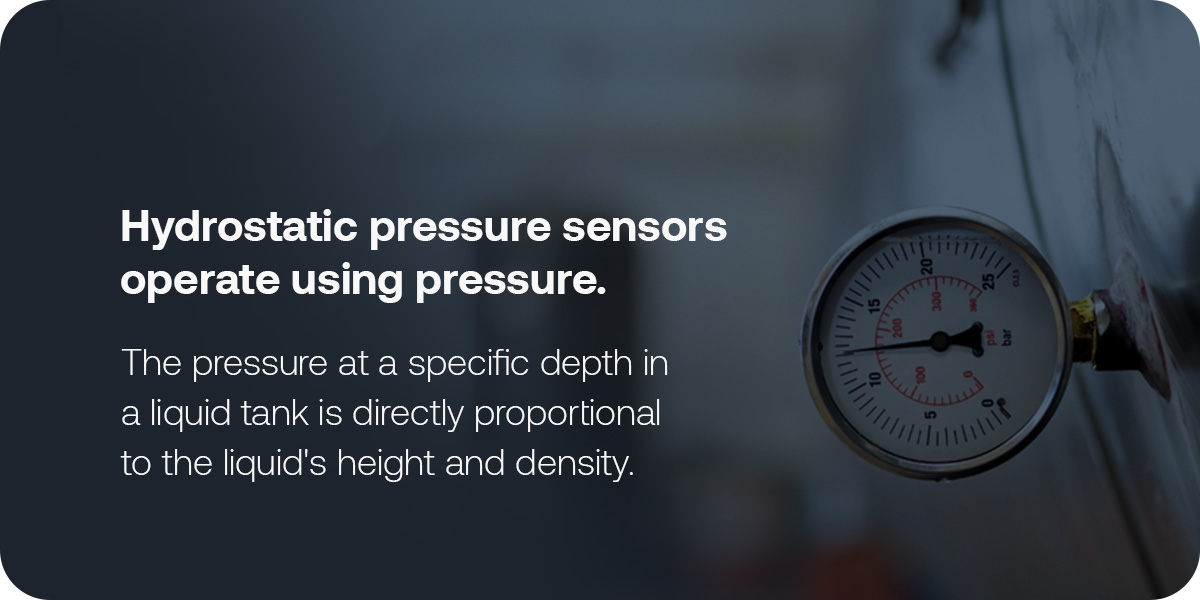
How Hydrostatic Pressure Sensors Work
Hydrostatic pressure sensors operate using pressure. The pressure at a specific depth in a liquid tank is directly proportional to the liquid’s height and density. The sensor sits at the bottom of the tank, where it measures pressure using a diaphragm or a strain gauge. A calibration factor based on fluid density converts the electrical signal into a level reading.
Contact sensors are excellent for aerated or agitated tanks. At the tank bottom, there’s no interference from foam or turbulence. They’re also cost-effective and simple to install. It’s an ideal solution for permanent installations in smaller or enclosed tanks.
Contact sensors are always in direct contact with the process fluid, so they require additional maintenance to remove the corrosion and scaling that can develop over time. Additionally, the sensor is only accurate if the liquid density remains consistent. Changes due to temperature or sediment buildup can impact readings. Facilities must regularly clean and calibrate to maintain accurate readings.
How to Select Your Tank Sensor
First, assess your specific circumstances. What tank type are you monitoring? What are the internal and external conditions? Ultrasonic, radar and hydrostatic sensors are all suitable for different environments. Here’s how to select the best option.
1. Identify Liquid Type and Properties
Your liquid’s composition and behavior are the first factors to consider when selecting a sensor. Chemical compatibility determines whether a contact-based sensor will corrode. Viscous, foam-forming and vapor-forming liquids will interfere with ultrasonic readings.
Radar sensors are the most versatile across liquid conditions. They rely on microwave signals instead of sound or contact, so they easily penetrate vapor, steam and foam. They can even tolerate corrosive atmospheres more easily. If your facility handles acids, caustics or chemical blends, radar provides the measurement accuracy and sensor performance you need.
2. Consider Tank Characteristics
Tank size, shape and material also affect sensor performance. Ultrasonic sensors need an unobstructed path between the transducer and the liquid surface. They’re less effective in narrow tanks or containers with baffles and mixers. Pressure sensors require full submersion and might need access through side ports or below the tank.
Radar sensors provide the most flexibility. You can mount non-contact radar devices at the top of almost any tank, regardless of height or configuration. Microwave signals can pass through nonconductive materials, so radar sensors can even measure through closed tank lids. This setup protects the sensor from splashing fluids or corrosive fumes, so they’re especially valuable for sealed chemical or reagent tanks.
3. Record Environmental Conditions
External conditions will also affect sensor reading reliability. Extreme temperatures, condensation, humidity and airborne dust can all degrade ultrasonic performance and damage exposed components. Sound waves slow and scatter in high-pressure or outdoor spaces, which impacts reading accuracy.
Outdoor conditions are less likely to affect contact sensors. However, changes to liquid density can affect their results. They need regular calibration and cleaning for best results. Radar sensors are largely immune to environmental conditions that affect ultrasonic devices. Electromagnetic signals maintain accuracy in conditions like high humidity or freezing weather. They’re the most consistent option for outdoor tanks or chemical storage yards.
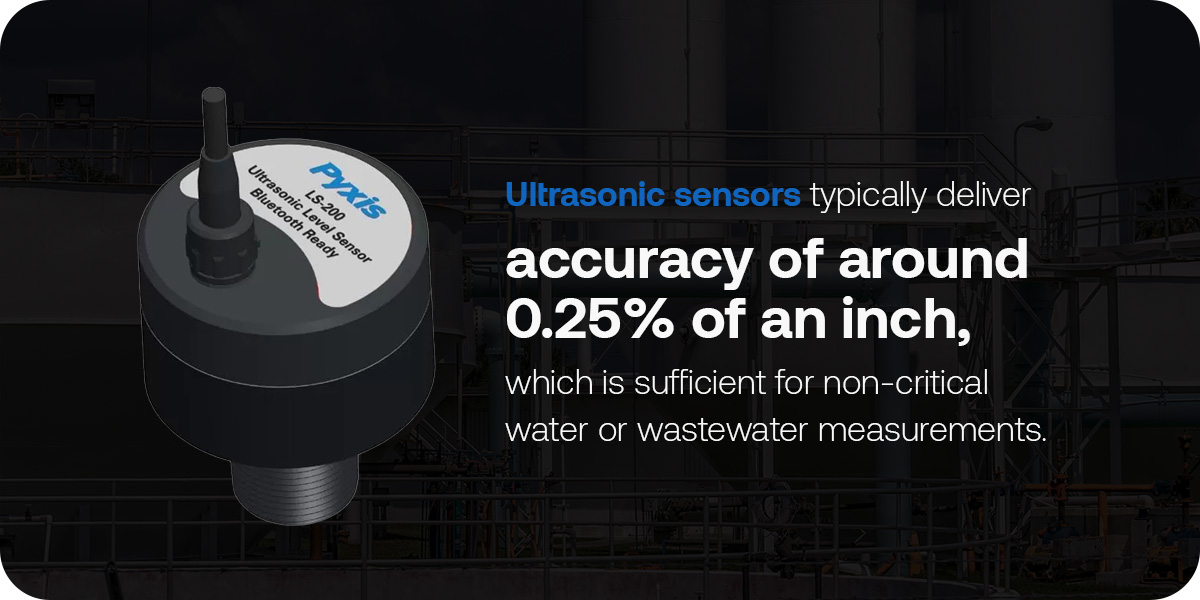
4. Establish Accuracy Needed
The precision and accuracy needed for your application determine which technology provides the most value. Ultrasonic sensors typically deliver accuracy of around 0.25% of an inch, which is sufficient for non-critical water or wastewater measurements. Hydrostatic pressure sensors generally achieve approximately 0.1% of full scale, though this value can drift due to changes in liquid density.
Radar sensors set the standard for precision. They offer millimeter-level accuracy in most configurations. This level of accuracy is essential if you’re dealing with automated chemical dosing or compliance monitoring. Radar sensors even offer this accuracy across temperature and pressure variations. They offer the most dependable data for high-value or safety-critical systems.
5. Compare Maintenance and Lifespan
Every level sensor has mechanical and environmental limits. Over time, wear and buildup can affect performance. A sensor that costs less up front may cost more in long-term maintenance and replacement fees.
While ultrasonic sensors are simple, convenient to install and affordable, they need frequent cleaning and inspection. If your facility sees constant vapor and chemical residue, teams will need to wipe down ultrasonic sensors regularly. Internal components will degrade with prolonged exposure to humidity or corrosive fumes. Ultrasonic devices last the longest in clean-water applications.
Hydrostatic pressure sensors will operate for long periods with minimal attention, but only when they’re compatible with fluid chemistry. Continuous contact with aggressive chemicals can wear down the sensor components. Inspect them regularly and recalibrate periodically to extend lifespan and avoid level drift.
Radar sensors have the longest lifespan and require the least maintenance. They never touch the process liquid, and air contamination doesn’t affect their signal. There’s little to clean or adjust after installation. Maintenance involves checking mounting integrity and confirming that electronics are moisture-free. Their solid-state design has no moving parts, and they can handle years of continuous indoor and outdoor operation.
A Smarter Solution for Industrial Water Treatment
Traditional tank monitoring often depends on manual inspections to check fluid levels. These methods are time-consuming and usually less accurate. They also expose your workers to unnecessary risks, especially when working with corrosive chemicals. Manual checks can’t keep up with modern operations’ demanding accuracy and safety needs.
AquaPhoenix’s TankScan® wireless monitoring system redefines efficiency. TankScan combines advanced radar-level sensing with remote data access. Operators gain real-time visibility into every tank across all sites. Its non-contact radar technology ensures accurate measurements, even in the most challenging conditions.
Users who integrate TankScan with AquaPhoenix’s monitoring platform can view live tank data from any device, receive automated alerts and optimize chemical deliveries based on actual usage.
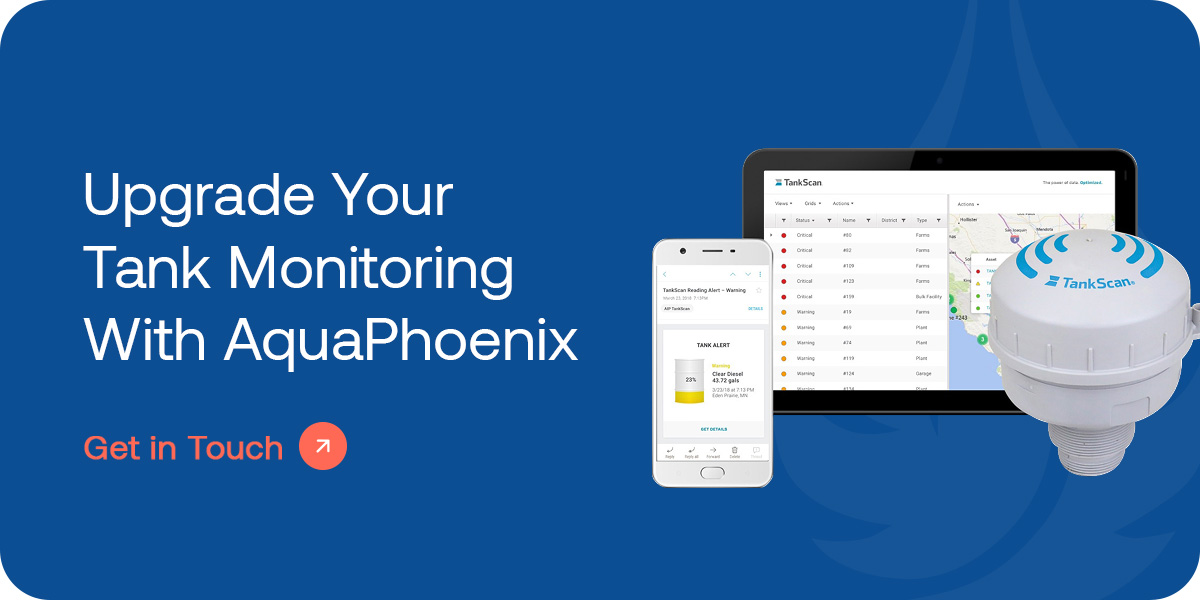
Upgrade Your Tank Monitoring With AquaPhoenix
Ultrasonic sensors are a cost-effective starting point, while pressure sensors are practical for simple systems. However, radar technology delivers the accuracy, durability and flexibility industrial water treatment demands.
AquaPhoenix brings that performance to your operation with TankScan radar sensors. Get the accuracy and precision you need while accessing remote monitoring and data-driven insights. TankScan integrates seamlessly with AquaPhoenix’s platform to support predictive maintenance and improved chemical inventory control.
Simplify tank monitoring. Contact AquaPhoenix to discuss your needs or explore our products online.
Aseptic manufacturing helps food and beverage industry products retain their freshness, flavor and nutritional value. At the heart of this process, hydrogen peroxide helps achieve sterility so that food products can be distributed through ambient-temperature channels.
However, hydrogen peroxide requires specific testing protocols to determine its effectiveness and safety. In this article, we discuss all aspects of hydrogen peroxide testing and how you can keep your products safe, meet regulatory compliance and keep operations running efficiently.
Why Hydrogen Peroxide Is Essential for Aseptic Manufacturing
Hydrogen peroxide is a broad-spectrum antimicrobial agent that can eliminate many microorganisms, including bacteria, yeasts and spores that can affect the integrity of the product. Using hydrogen peroxide in aseptic filling is the result of decades of research and regulatory scrutiny. The Food and Drug Administration (FDA) approved it in 1981, and it remains the industry standard for sterilizing packaging materials before filling.
Mechanisms and Methods of Application
Hydrogen peroxide is often applied in aseptic packaging in one of two ways:
- Immersion baths: An immersion bath involves submerging the packaging materials in a hydrogen peroxide solution, making sure they are adequately penetrated. This method can be especially effective for complex geometries.
- Vaporized or spray systems: In this method, hydrogen peroxide is vaporized or atomized and directed onto packaging surfaces. The approach is often used for cartons, PET bottles and plastic cups, rapidly sterilizing with minimal chemical usage.
Both forms of hydrogen peroxide application are engineered to help products achieve commercial sterility, or a state in which the probability of a viable microorganism surviving is extremely low.
Achieving Commercial Sterility
To achieve commercial sterility, hydrogen peroxide’s oxidative properties must disrupt cell membranes, denature proteins and degrade nucleic acids, rendering microorganisms nonviable, including resilient spores that can survive conventional pasteurization.
By eliminating spoilage organisms, hydrogen peroxide can keep products stable for months or even years without refrigeration, supporting global supply chains and ultimately reducing food waste.
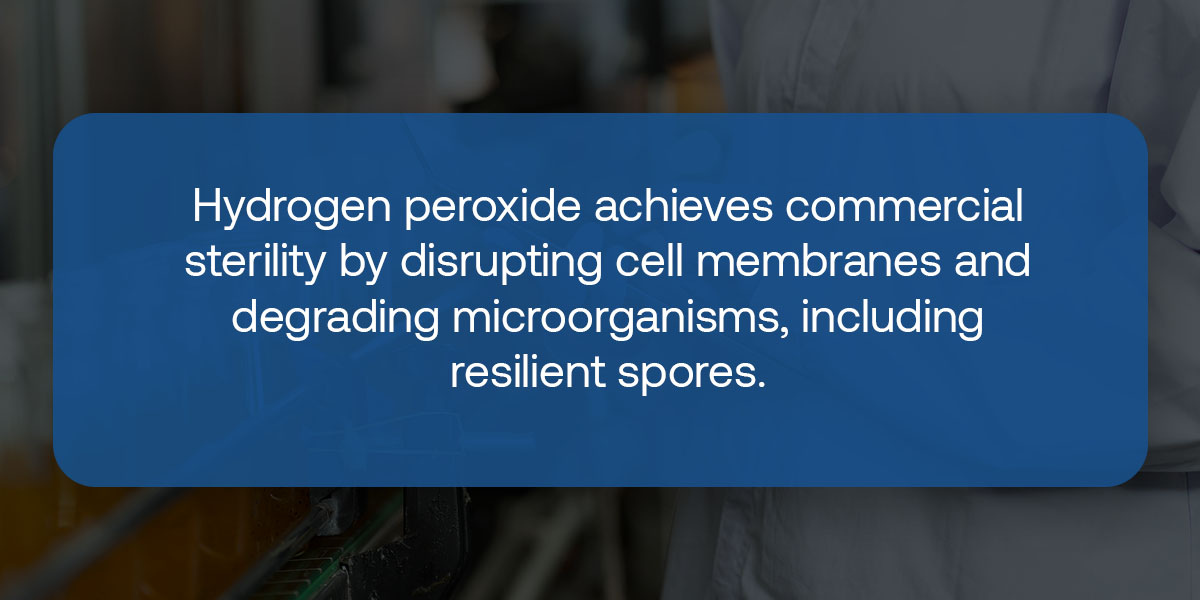
Material Compatibility
Hydrogen peroxide is effective for various packaging substrates, from multilayer cartons and PET bottles to polypropylene cups. Its compatibility with these materials is a key reason for its widespread adoption. Unlike some sterilants, hydrogen peroxide decomposes into water and oxygen. When properly managed, it does not leave toxic residue.
Ultimately, the use of hydrogen peroxide in aseptic filling is about more than just microbial control — it is about meeting consumer expectations for safety, quality and convenience. However, the benefits of hydrogen peroxide are only realized when quality manufacturers tightly control and monitor its application.
Navigating FDA Compliance and Safety Standards
While indispensable for aseptic packaging, the use of hydrogen peroxide is governed by strict regulations. The FDA’s guidelines were created to reduce the chances of residual hydrogen peroxide posing a risk to consumers.
Key Regulation: FDA 21 CFR 178.1005
FDA 21 CFR 178.1005 stipulates that residual hydrogen peroxide in the final packaged product must not exceed 0.5 parts per million. This limit was established to protect consumers from potential adverse effects while allowing manufacturers to use hydrogen peroxide for sterilization. This regulation requires running distilled water through the production process to determine the hydrogen peroxide amount, performing the assay right after packaging.
Compliant CHEMetrics Testing
CHEMetrics manufactures colorimetric hydrogen peroxide test kits to help support FDA compliance. These kits can accurately measure residue and are made for rapid, on-site analysis, so quality managers can make decisions in real time. Overall, CHEMetrics tests offer:
- Immediate test results, in less than two minutes, at the point of testing.
- Long-term reagent stability.
- Accuracy.
The Importance of Removal
The aseptic process helps minimize hydrogen peroxide residues. Once sterilized, the sterile hot air degrades the hydrogen peroxide into water and oxygen. Any deviation can lead to noncompliant residue levels, which can result in irritation and health issues. By monitoring these levels consistently and ensuring the correct removal process, you can safeguard the quality of our product and meet compliance.
Risks of Noncompliance
Exceeding the regulatory hydrogen peroxide limits can lead to product recalls and affect consumer safety. Meeting compliance helps to avoid fines or even facility shutdowns.
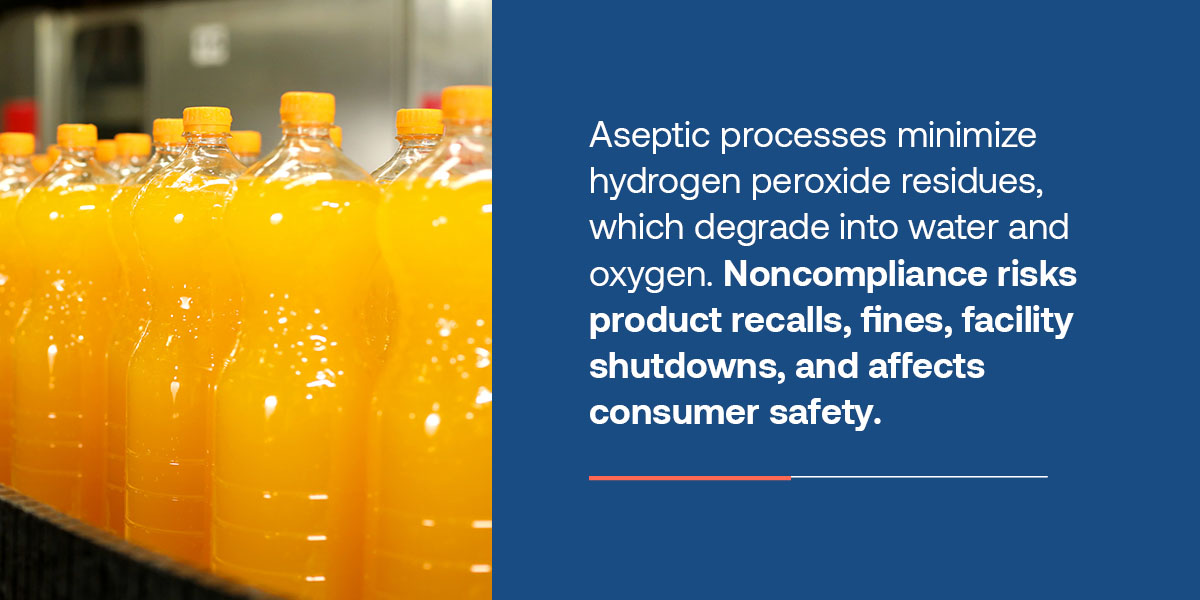
How to Develop a Hydrogen Peroxide Testing Protocol
A strong hydrogen peroxide testing protocol safeguards consumers, helps you meet compliance and can increase your operational efficiency. With it, quality managers can find deviations early, prevent contamination and keep products at a consistent quality. Follow these steps to develop an effective hydrogen peroxide testing routine:
Step 1: Identify Critical Control Points
The first step is to map the aseptic process and determine where hydrogen peroxide testing will have the greatest impact. Critical control points typically include:
- Post-sterilization: This involves testing your hydrogen peroxide levels immediately after the sterilization step, before filling. This way, you can verify that all packaging materials are free of viable microorganisms and your levels are within the target ranges.
- Post-filling and sealing: Another testing point is right after filling the product and sealing the package, to ensure hydrogen peroxide residuals do not exceed the regulatory limits.
- After maintenance or equipment change: Any time the sterilization system is serviced or modified, you will need to perform testing to validate system performance.
Step 2: Determine Testing Frequency
The frequency at which you test the hydrogen peroxide will depend on the specific step of the process, the product and regulations. Consider these general guidelines:
- Start of each production run: Baseline testing at the start of each shift or batch will make sure your system is operating within its specifications.
- Regular intervals: Ongoing testing at defined intervals, such as every hour, can give you continuous assurance of process control.
- After maintenance or process deviations: Any change in equipment, process parameters or raw materials will require additional testing.
The goal is to strike a balance between thoroughness and efficiency, where you test enough to catch deviations but not too often that it disrupts production.
Step 3: Select the Right Testing Method
Choosing the right testing method is crucial, as you need something that is accurate, sensitive and easy to implement on the production floor. You should consider factors like detection limits, ease of use, cost and compatibility with your packaging materials and process conditions.
Common approaches include:
- Colorimetric test kits: These kits use a chemical reagent that changes color in the presence of hydrogen peroxide. The intensity of the color is proportional to the concentration, allowing for rapid, semi-quantitative analysis. The CHEMetrics analytical system involves pre-dosing and packaging the hydrogen peroxide liquid reagent in a vacuum-sealed ampoule. Immerse the kit’s ampoule tip in the sample and snap the tip off, and the sample is automatically drawn into the ampoule. Once inverted enough to support mixing, you can compare the ampoule to the color standard ampules for a test result.
- Instrumental analysis: Techniques such as spectrophotometry or electrochemical sensors provide higher sensitivity and precision but might require specialized equipment and training. CHEMetrics also offers an instrumental version of their test kit. In this version, you follow the same procedure as the colorimetric system, except the ampoule is read in a photometer instead of comparing visuals to color standards.
- Online monitoring: For high-throughput operations, automated systems can give you continuous, real-time data to take quick action if needed.
Step 4: Document Everything
Documentation, more than a regulatory requirement, is best practice for quality assurance. Be sure to log every test result with the following information:
- Date and time
- Operator name
- Test location
- Test method and kit lot number
- Measured value
- Corrective actions, if any
Comprehensive records are important for meeting Hazard Analysis and Critical Control Points compliance. They also help with audits, providing evidence that you have followed the testing steps diligently.
Step 5: Train and Empower Your Team
Your team must be able to follow your testing routine correctly. With regular training, you can ensure all operators understand how important hydrogen peroxide testing is, are proficient in the chosen methods, and can respond to any results that are out of the norm. A user-friendly test kit can also simplify the training process and help you avoid errors.
Step 6: Review and Improve
Continuous improvement is crucial throughout your testing routines. Review your testing protocols at routine intervals, looking for opportunities to optimize them. Gather feedback from operators, watch for trends in the test results and stay ahead of testing technology advances.
Following this framework for hydrogen peroxide testing in aseptic packaging can help you create a protocol that meets regulations and supports smoother operations.
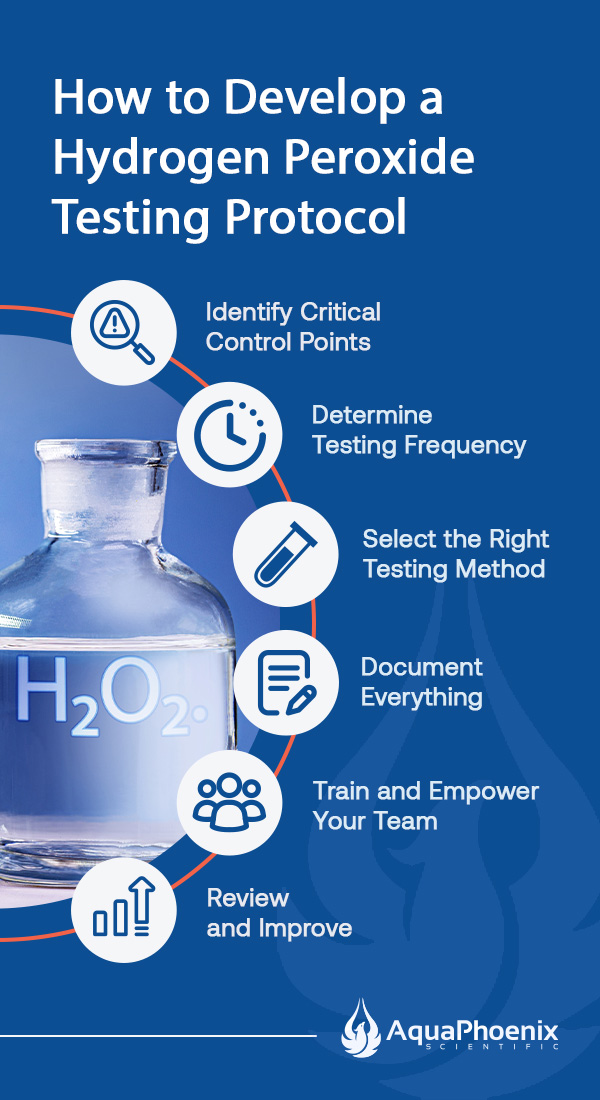
Best Practices for Sampling and Troubleshooting
You need a consistent sampling protocol to ensure the most accurate hydrogen peroxide testing process. These best practices can help you keep your hydrogen peroxide levels in safe, compliant limits:
Collect Samples at Critical Points
Collect samples at all critical points of the production process, including right after sterilization and after product filling and sealing. For post-filling checks, a common approach is to fill the package with sterile distilled water, seal, shake thoroughly and then test the rinse water for any residuals. This method allows you to simulate real production conditions and get a more reliable measure of remaining sterilant.
Validate Your Chosen Method
When setting up your testing program, you will need to validate the chosen method, which includes running duplicate samples and using known standards to check for accuracy. You should also periodically verify that your test kits or instruments are working correctly. Documenting these validation steps can also help you build confidence in your results.
Be Aware of Interferences
Be aware of any potential interferences that could affect your hydrogen peroxide measurements. Other oxidizing agents, like peracetic acid or chlorine, for instance, could be present in the production environment and lead to false positives.
If you use these chemicals, consider using a neutralizing agent or choosing a test kit specific to hydrogen peroxide. Additionally, turbid or colored samples can sometimes interfere with colorimetric readings. In these cases, you might use instrumental analysis to get more reliable results.
Quick Troubleshooting
If test results indicate high or variable hydrogen peroxide residues, investigate possible causes like improper hot air removal, equipment misalignment or inconsistent sterilant application. Regular maintenance, equipment calibration and proper operator training can minimize these issues.
Linking Efficient Testing to Production Uptime
The right hydrogen peroxide testing approach will maximize production uptime and minimize costs. A slower or inconsistent testing process could become a bottleneck, leading to delays in your production, higher scrap rates or even leading to the discard of entire batches.
Preventing Costly Downtime
A proactive testing routine helps detect deviations early, like malfunctioning air heaters or a drift in the hydrogen peroxide concentration, so you can take quick action. It keeps minor problems from turning into major disruptions, protecting the quality of your product as well as your profitability.
For instance, a sudden spike in hydrogen peroxide residue found during routine testing could signal a failure in the hot air removal system. With efficient testing, maintenance teams have plenty of time to intervene before the problem affects large volumes of product, preventing costly reworks or disposal.
Simplifying Team Training
With user-friendly test kits, you spend less time training while minimizing the risk of human error. You get consistent and reliable results, which is essential for maintaining process control and meeting regulations.
For instance, simplified instructions and intuitive workflows help you quickly onboard new team members and ensure testing protocols are followed consistently. Clear, concise steps to follow also help reduce the risk of mistakes, supporting both compliance and operational efficiency.
Partner With AquaPhoenix Scientific for Your Testing Needs
Hydrogen peroxide testing is essential for the safety, compliance and efficiency of your manufacturing line. Proactive testing measures can help you maintain continuous production, reducing downtime or errors and supporting your organization’s overall business objectives. At AquaPhoenix, we provide water analysis solutions tailored to the unique demands of aseptic packaging.
We remain committed to upholding the highest standards of safety, quality control and customer support. Our customized test kits include clear and straightforward instructions so your team can perform tests as quickly and accurately as possible. We also provide expert technical support and advanced data management tools for your specific manufacturing needs.
Our regulatory expertise and compliance support also help you stay ahead of changing compliance requirements. We provide fast deliveries, so you can rely on us for your hydrogen peroxide testing needs. Contact us today to optimize your aseptic packaging line and ensure ongoing compliance.
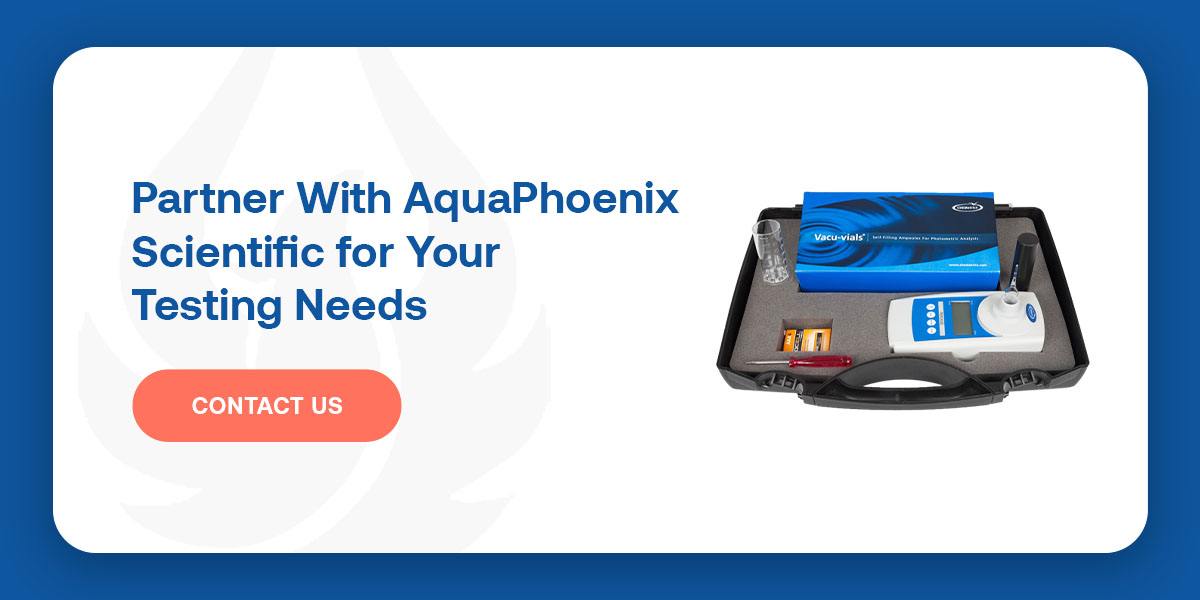
Boilers are essential for heating, manufacturing and sterilization, but scaling and corrosion are twin threats lurking in every commercial and industrial boiler room. Licensed professionals tasked with keeping these systems running safely and efficiently must understand the science behind these issues and how to prevent them from causing damage.
Learn how to bridge chemical theory with practical, actionable strategies for diagnosing, monitoring and preventing scaling and corrosion in boilers. This guide is a comprehensive, technician-focused resource that equips you with the knowledge and tools needed to troubleshoot efficiency drops, implement proactive maintenance programs and protect your boiler investment.
Scaling and Corrosion Problems in Boilers
Before you can control scaling and corrosion, you need to understand what they are and how they differ. While both are forms of boiler “attack,” their mechanisms, symptoms and solutions are distinct.
Scaling
Scaling is a challenge that can significantly impact performance and reliability. For example, in a food processing plant, untreated hard makeup feedwater can lead to rapid scale buildup inside boiler tubes. Over time, this results in a noticeable drop in steam output and a spike in fuel consumption.
Every technician can recognize and remedy these characteristics and consequences of scaling.
- Deposits of mineral solids, often calcium, magnesium and silica, on internal boiler surfaces.
- These deposits accumulate into hard, insulating layers that obstruct heat transfer and can cause localized overheating.
- Scaling is most common in areas of high temperature and evaporation, like boiler tubes and heat exchangers.
Corrosion
Corrosion is a serious threat to equipment integrity and operational safety. For instance, a facility using improperly treated feedwater may experience oxygen pitting in the boiler drum. This phenomenon can lead to small but deep holes that may eventually cause leaks or catastrophic failure of a boiler system.
When monitoring boiler corrosion and its causes, consider the following defining features:
- The electrochemical degradation of metal surfaces often results in pitting, thinning or rust formation.
- Dissolved oxygen in boiler system water, low pH, carbon dioxide and other aggressive ions in the water lead to corrosion.
- These issues can occur throughout the boiler system, including feedwater lines, boiler tubes and condensate return.
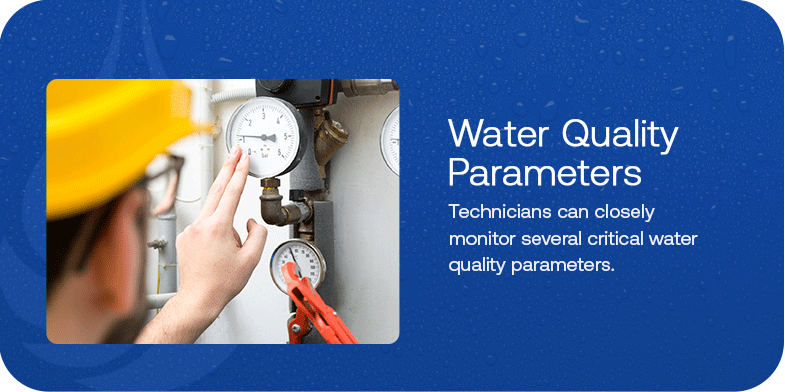
The Chemical Difference Between Scaling and Corrosion
Scaling results from physical deposits in a boiler system, while corrosion is a chemical or electrochemical attack on metal. Both phenomena reduce efficiency and threaten system integrity, but they require different monitoring and control strategies. Understanding the distinction is essential for effective diagnosis and treatment.
A technician’s best defense is a solid grasp of the chemical reactions that cause scale and corrosion in boilers. This section breaks down the root causes and water chemistry parameters to control.
Scaling
Scaling in boiler systems results from heating and concentrating water during operation. As ions like calcium, magnesium and silica become supersaturated, they react to form solid deposits on internal surfaces. For example, calcium ions combine with carbonate ions to form calcium carbonate scale, while magnesium ions react with silicate ions to produce magnesium silicate scale.
The risk of scale formation increases in environments with high alkalinity, elevated total dissolved solids and higher operating temperatures. These factors speed precipitation and the buildup of insulating layers.
Corrosion
Corrosion in boiler systems is due to a series of electrochemical reactions that degrade metal surfaces. One of the most typical forms is oxygen corrosion, where iron reacts with dissolved oxygen and water to form iron hydroxide, commonly known as rust. Another cause is carbon dioxide corrosion, which can occur when carbon dioxide dissolves in water to form carbonic acid, lowering the pH and aggressively attacking metal components.
The risk of corrosion increases in conditions with low pH, high levels of dissolved oxygen and the presence of aggressive ions like chlorides or sulfates, all of which can accelerate the breakdown of metal surfaces.
Water Quality Parameters
Technicians can closely monitor several critical water quality parameters to control scaling and corrosion problems in boilers, including pH, alkalinity, hardness, silica, dissolved oxygen, total dissolved solids and conductivity.
Regular testing and adjustment of these parameters are essential for maintaining boiler performance and preventing the onset of scale and corrosion.
How Scaling and Corrosion Impact Boiler Performance and Safety
Unchecked scaling and corrosion in boilers can lead to catastrophic failures, costly downtime and regulatory violations. Here’s what’s at stake.
- Efficiency losses: Even a millimeter-thick scale layer can reduce heat transfer efficiency and increase fuel consumption by 5% to 8%. Corrosion can cause leaks and thinning, leading to heat loss and reduced steam output.
- Safety hazards: Scale can cause localized overheating and tube failure, risking explosions, while corrosion may result in ruptures, leaks and dangerous steam releases.
- Cost implications: Scaling and corrosion problems in boilers can increase energy bills and lead to frequent repairs, unplanned shutdowns and shortened equipment lifespan. In addition, regulatory fines or insurance issues may result from violating safety standards.
Signs and Testing Protocols for Diagnosing Scaling and Corrosion
Early detection is critical. Technicians should learn the telltale signs of scale and corrosion and the testing protocols to prevent them from escalating.
1. Visual and Operational Clues
Diagnosing boiler issues requires vigilance and a sharp eye for visual and operational clues. When scale is present, seasoned professionals may notice a reduction in steam output, increased fuel consumption and the development of hot spots on boiler surfaces. Noisy operation and visible mineral deposits during inspection can also indicate scaling.
In contrast, corrosion often shows up through these symptoms, which can signal underlying chemical imbalances or the presence of aggressive ions in the water.
- Rust stains
- Pitting
- Leaks
- Thinning metal
- Unexplained pressure drops
- Water discoloration
2. Testing Protocols
Using rigorous testing protocols is the best way to catch and address these issues. Regular water sampling and analysis for parameters like pH, hardness, alkalinity, silica, dissolved oxygen and TDS provide a detailed picture of water quality.
Using specialized test kits and meters for on-site, real-time monitoring allows technicians to detect deviations before they snowball out of control. Scheduled shutdowns should always include a thorough inspection of boiler internals to check for hidden scale deposits or corrosion damage.
For those seeking advanced solutions, AquaPhoenix Scientific supports precise, on-the-spot analysis for maintaining optimal boiler protection. These include test kits using Rose Bengal chemistry to measure residual corrosion inhibitors in boiler systems, like film-forming amines.
3. Documentation
Documenting all findings and maintenance actions in a digital or physical logbook of test results, operational changes and corrective measures allows for effective trend analysis.
By tracking these data points over time, technicians can spot gradual changes in system performance and intervene before minor issues become critical failures. This proactive approach safeguards equipment and supports regulatory compliance and operational efficiency.
Proactive Prevention Strategies for Scaling and Corrosion
Preventing boiler water scaling and corrosion is always more cost-effective than repair. Here’s how to build a robust, proactive program to keep scale and corrosion at bay.
Water Treatment Fundamentals
Effective boiler water treatment starts with pre-treatment processes like softening, reverse osmosis or demineralization to remove hardness ions and silica from the feedwater. These are essential for minimizing the risk of scale formation and protecting boiler component longevity.
Chemical dosing will further protect the system:
- Scale inhibitors like phosphates and polymers keep minerals dissolved in the water, preventing them from depositing on boiler surfaces.
- Oxygen scavengers, including sulfite, DEHA or hydrazine, eliminate dissolved oxygen, which is a primary driver of corrosion.
- Introducing pH adjusters as needed maintains optimal alkalinity, creating a stable environment that discourages scaling and corrosion.
Automated Monitoring and Control
Modern boiler systems benefit from automated chemical feed and monitoring systems, which lock in consistent dosing and provide real-time alerts if water chemistry deviates from set parameters. These systems can integrate with supervisory control and data acquisition or distributed control systems for data logging and remote oversight.
This interaction streamlines operations and allows workers to respond quickly to potential issues, reducing the risk of costly downtime.
Routine Maintenance
Routine maintenance and repair are the foundation of any successful boiler water treatment program. The American Society of Mechanical Engineers Boiler and Pressure Vessel Code provides a definitive source of data for boiler maintenance, inspection and operation.
Scheduled blowdown procedures remove concentrated impurities from the system, addressing boiler water scaling and its prevention to avoid scale and sludge buildup. Regular inspection and cleaning of boiler internals are also critical because they enable technicians to identify and address early signs of difficulties before they escalate.
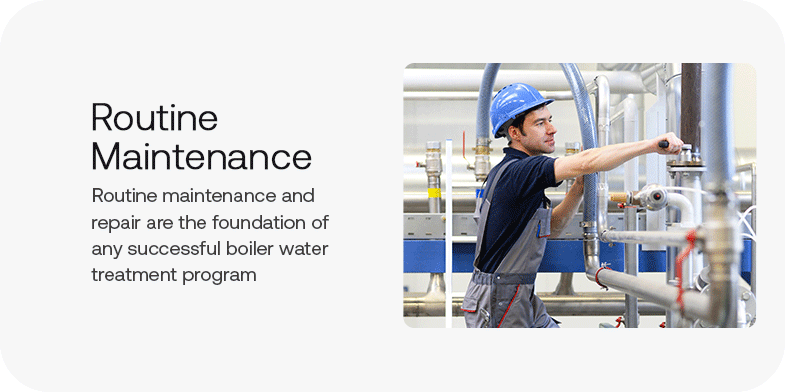
Staff Training
Finally, ongoing education and training for staff are vital to maintaining an effective water treatment program. Regular instruction on water chemistry principles, the latest testing protocols and appropriate emergency response procedures prepare a team to manage challenges and uphold the highest standards of boiler operation and safety.
The Technician’s Toolbox — Essential Testing and Measurement Equipment
Accurate, reliable testing is integral to any successful water treatment program. Here’s what every boiler professional should have in their arsenal.
Core Instruments
To monitor and manage boiler water quality, technicians depend on a suite of core instruments designed for accurate and reliable testing. The following tools are available in portable and bench-top formats, making them suitable for on-site field assessments and detailed laboratory analysis:
- pH meters
- Conductivity meters
- Hardness test kits
- Silica test kits
- Dissolved oxygen analyzers
Best Practices
Following established best practices when testing boiler water leads to accurate and consistent results. These guidelines help technicians maintain instrument reliability and data integrity, whether working in the field or the lab:
- Rinse and clean testing equipment thoroughly after each use to prevent cross-contamination.
- Record calibration dates and maintenance activities in a dedicated logbook for traceability.
- Perform routine checks for signs of wear, damage or expired reagents and replace as needed.
- Train all users on proper handling and operation of each instrument to minimize user error.
- Periodic proficiency testing or inter-laboratory comparisons verify measurement accuracy.
- Keep instruments and reagents in a controlled environment to avoid exposure to extreme temperatures or humidity.
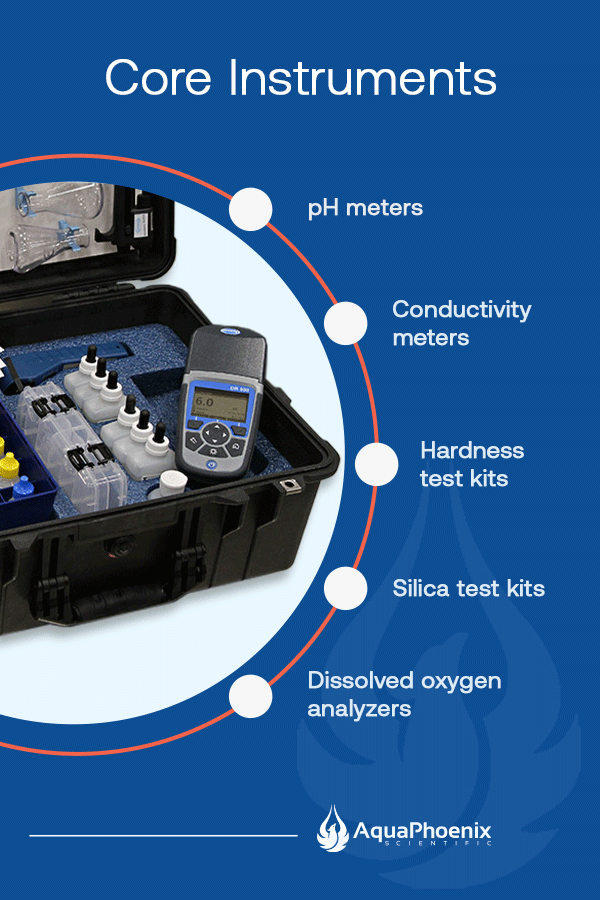
Building a Culture of Prevention Through Documentation, Training and Continuous Improvement
Fostering prevention through multiple avenues is vital for long-term success. Vigilance and a commitment to refining practices prevent boiler scaling and corrosion. The following soft skills reinforce technical solutions and embed them into daily operations.
- Documentation: Keep detailed records of water quality, maintenance actions and system changes. Use digital logbooks for easy trend analysis and compliance reporting.
- Training: Regularly update staff on new testing methods, treatment technologies and safety protocols. Encourage knowledge sharing and cross-training among team members.
- Continuous improvement: Review and refine water treatment programs based on performance data and incident reports and stay current with industry best practices and regulatory changes.
Protecting Your Boiler Investment
Scaling and corrosion are persistent, but they’re not inevitable. With knowledge, tools and a proactive mindset, technicians and operators can understand the mechanisms behind scaling and corrosion in boilers, recognize early warning signs, protect critical equipment and maintain reliable operations.
Regular water conditioning is vital. It allows early detection of potential issues and supports data-driven decision-making. Along with a culture of continuous improvement where teams consistently review results, update protocols and invest in ongoing training, this proactive approach ensures boiler systems remain safe, efficient and compliant for the long term.
Partner With AquaPhoenix Scientific for Reliable Boiler Water Testing Solutions
Are you ready to take control of your boiler’s health? AquaPhoenix Scientific is your partner in preventing boiler scaling and corrosion. We offer:
- Comprehensive boiler water testing kits and reagents for all parameters.
- Fast, reliable delivery and expert consultation.
- Support for building and refining your water treatment program.
Contact us today to discuss your facility’s needs and learn how you can leverage our expertise to implement a robust, data-driven prevention strategy.

Industrial water conditioning is vital for protecting people, equipment and the environment from harmful contaminants. The water conditioning process involves proactive testing and treatment processes to maintain the proper levels of metals, chemicals and organic solids. With this comprehensive water conditioning overview, you can determine the best water testing and treatment methods for your facility.
What Is Industrial Water Conditioning?
Industrial water conditioning modifies water characteristics to make it suitable for specific industrial applications. It involves thorough testing and treatment processes to reduce or eliminate impurities such as chemicals, suspended solids, volatile organic compounds (VOCs) and dissolved minerals.
Why Water Conditioning Is Necessary
Industrial water testing and treatment are vital for these reasons:
- Health and safety: Water conditioning removes or reduces harmful toxins and pathogens such as Legionella, E. coli, and per- and polyfluoroalkyl substances that could cause illness.
- Compliance: Proactive water testing and treatment can help you comply with regulations such as drinking water standards and discharge limits.
- Process efficiency: Industrial equipment operates more efficiently when it’s free of corrosive or scale-producing contaminants. Removing corrosive contaminants from your systems helps ensure filtration, water flow and temperature control functions work properly. This also prevents repair needs, increasing your equipment’s uptime so you can keep operations on schedule.
- Equipment protection and uptime: Water treatment also protects your equipment from damage, reducing repairs, maintenance needs and associated costs.
- Environmental protection: Testing and treating your facility’s water helps ensure effluents meet the proper limits for metals, chemicals, organic matter and toxicity.
Regular testing provides the necessary data to help you make informed decisions about your chemical or physical treatments. Proactive monitoring is safer and more cost-effective than reactive maintenance and repairs.
What Industries and Types of Equipment Require Water Conditioning?
Water conditioning is vital for any application involving water in processes such as cleaning, cooling or product manufacturing. The following applications require water testing and treatment:
- Power generation: Power generation systems typically involve equipment such as cooling towers, boilers and feed water systems. Water conditioning prevents corrosion, scaling and fouling.
- Oil and gas: The oil and gas industry uses water for cooling, steam generation and refining. The systems involved in these processes require testing to protect equipment and ensure operational efficiency.
- Food and beverage: The food and beverage industry depends on clean water to ensure consumer health and safety. Water used in food or beverage production must meet strict quality standards, making thorough testing and treatment crucial.
- Dairy: Similar to the food and beverage industry, dairy processing systems require water conditioning for health and safety purposes. Testing water used in cleaning and processing equipment prevents contamination.
- Sugar mills and refineries: Sugar mills and refineries require water testing for various stages in their processing and refining systems.
- Pharmaceuticals: Pharmaceutical manufacturing plants rely on clean, pure water for product efficacy and safety. The Food and Drug Administration sets stringent regulations, and maintaining quality water conditioning processes helps companies meet compliance.
- Textile manufacturing: The textile manufacturing industry uses water for production processes such as washing and dyeing. Water conditioning helps ensure consistent results in these processes.
- Pulp and paper production: Pulp and paper mills use water conditioning to prevent contaminants from interfering with the paper-making process.
- Aircraft and automotive manufacturing: Aircraft and automotive manufacturing industries use water in processes such as parts treatment and cleaning. Regular water conditioning protects equipment and helps ensure consistent results in final products.
- Microelectronics: The microelectronics industry depends on high-purity water for semiconductor manufacturing processes. Water conditioning prevents contamination to ensure high-quality products.
Core Water Quality Parameters
Water testing focuses on these main parameters to help you manage clean, safe water for industrial applications:
Managing Water Hardness
Dissolved minerals like magnesium and calcium can increase water hardness, which can cause scale buildup in industrial equipment such as boilers, pipes and cooling towers. Managing water hardness helps ensure efficient heat transfer, helping your company reduce energy expenses.
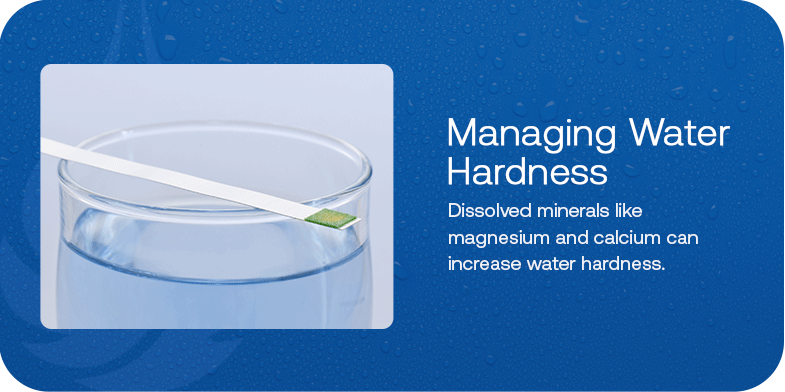
Controlling Microbiological Growth
Unmanaged microbiological growth in industrial water can cause microbiologically influenced corrosion and health risks such as Legionella. Thorough testing helps you determine the exact biocide type and concentration your water requires, which is essential for controlling:
- Bacteria
- Algae
- Fungi
- Biofilm formation
Preventing Scale and Corrosion
Chemical exposure or environmental factors can lead to corrosion in your equipment’s metal components. This gradual deterioration alters your equipment’s structural integrity, reduces its effectiveness and leaches metals into your process water.
Mineral deposits can produce scale on your equipment’s metal components, which restricts fluid flow, accelerates corrosion and reduces efficiency by insulating surfaces. Testing these factors can help prevent scale and corrosion in your equipment:
- pH levels: Low pH levels can cause corrosion, and high pH levels can lead to scale buildup. Testing pH levels enables you to proactively treat your water for efficient flow, temperature control and equipment longevity.
- Alkalinity: Similar to pH levels, low alkalinity often leads to corrosion, while high alkalinity can cause scale buildup.
- Temperature: Higher temperatures typically increase the rate of chemical reactions, which can promote scale formation or corrosion. Testing your equipment’s temperature and conductivity can help you maintain the proper temperatures for corrosion and scale prevention.
Monitoring Total Dissolved Solids (TDS) and Disinfectant Residuals
In addition to conductivity, you should also monitor your equipment’s TDS levels. TDS levels indicate how many dissolved ions are in your water, helping you manage blowdown in boilers and cooling towers. Managing blowdown is important for preventing sludge, scale and corrosion. It’s also necessary to test levels of disinfectants such as chlorine to control microbial growth.
Common Water Testing Methods and Tools
These common water testing methods and tools are essential for the water conditioning process:
Colorimetric Testing
Colorimetric testing uses photometers and comparators to indicate a specific substance’s concentration in your water. In this method, a reagent reacts with a sample to reveal the intensity of the sample’s color and indicate the substance’s concentration. Colorimetric testing is best for
quick, visual concentration estimations.
Titration
In the titration method, technicians use drop tests or burettes to gradually add a reagent to a substance until a color change occurs. The number of drops indicates the substance’s concentration in your water. This is an excellent way to monitor alkalinity or hardness. Titration kits are best for precise, quantitative measurements of concentrations.
Electrochemical Meters
Electrochemical meters are portable and can perform instant readings of these parameters:
- pH levels
- Conductivity
- Oxidation-reduction potential
Microbiological Testing
Microbiological testing involves culture-based methods such as dipslides to monitor microbial activity. This method is an excellent option for detecting and measuring microorganisms such as:
- Viruses
- Bacteria
- Fungi
Detecting potentially harmful microorganisms helps protect equipment such as pipelines and cooling towers from biofouling. It’s also vital for ensuring safe water in applications such as pharmaceuticals, food processing and beverage manufacturing.
Quality Test Kits for Precise, Dependable Results
Reliable test kits allow you to identify contaminants in your facility’s water and make informed decisions. The following water test kits use quality instruments and reagents to measure specific impurities:
Alkalinity
EndPoint ID® water alkalinity test kits measure levels of:
- Carbonate
- Bicarbonate
- OH alkalinity
These kits titrate your water sample with a basic acid solution, reaching a specified pH endpoint. pH 8.3 is the phenolphthalein alkalinity, and pH 4.6 is the total alkalinity.
Chelant
Measuring chelant levels is vital for controlling industrial water equipment with parts-per-million (ppm) ethylenediaminetetraacetic acid (EDTA) results. Chelant kits help prevent calcium, copper, magnesium and iron scaling by combining metal ions in a solution. Chelant test kits are excellent for applications involving industrial water treatment, sanitation and cleaning, and water and soil cleanup.
Chemical Oxygen Demand (COD)
COD kits test water samples for the level of oxygen necessary to oxidize organic matter present in the sample. This analytical, indirect method provides a quick, reliable measure of organic pollution, which is especially crucial in wastewater treatment applications. Higher organic compound concentrations result in higher COD measurements.
Chloride
Chloride test kits are important for boilers and cooling towers. A chloride test uses a silver nitrate solution to titrate your water sample with a chromate indicator. This helps control cycles in your industrial boiler and cooling tower. You can also opt for a mercuric nitrate titrant if you need lower-level detections.
Chlorine
If you use chlorine as a microorganism control agent in your water systems, it’s essential to measure total and free chlorine levels. Chlorine kills pathogens such as mold species, sulfate-reducing bacteria and slime-producing bacteria in various wastewaters and applications. You can use a chlorine test kit and choose from several chemistries to measure total and free chlorine levels.
Chlorine Dioxide
Chlorine dioxide testing is important for cooling towers. You can test concentration levels using accurate chlorine dioxide test kits that deliver results in ppm.
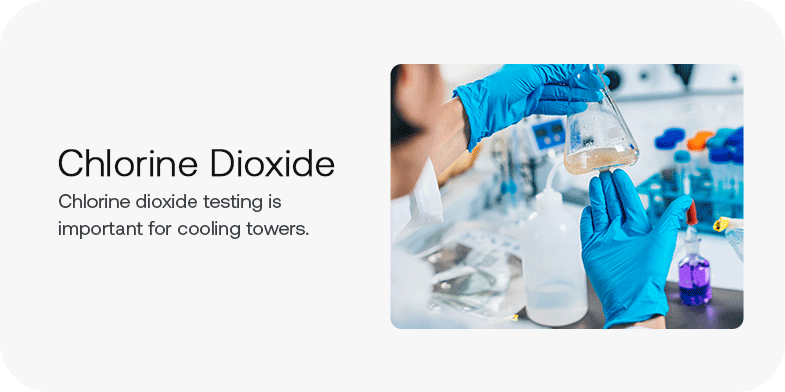
Hardness Test Kits
Scale can accumulate in your equipment as magnesium and calcium salts dissolve in your process waters. Hardness test kits detect trace levels of hardness starting at 0.3 ppm. EndPoint ID hardness test kits use EDTA chemistry to titrate magnesium and calcium levels.
Hydrogen Peroxide
Hydrogen peroxide test kits measure hydrogen peroxide concentration levels in ppm. You must test hydrogen peroxide levels in applications such as wastewater and wash water.
Orthophosphate
Orthophosphate helps prevent corrosion and control manganese and iron in water. Orthophosphate test kits include filtering equipment to use before testing for the most accurate results.
Phosphate
Phosphate test kits express results as ppm, hydroxyethylidene diphosphonic acid, or phosphonobutane tricarboxylic acid. You can also use a modified phosphate test kit for high alkaline waters or potential fluoride interference. For the greatest accuracy, verify your results with a Hach UV digestion kit.
Sulfite
Sulfite scavenges oxygen to prevent pitting and corrosion in water, and it’s common in boiler applications. Sulfite test kits offer a range of titrants and indicators to match your PPM detection requirements. For the most accurate results, it’s important to let each sample cool quickly and complete the test immediately.
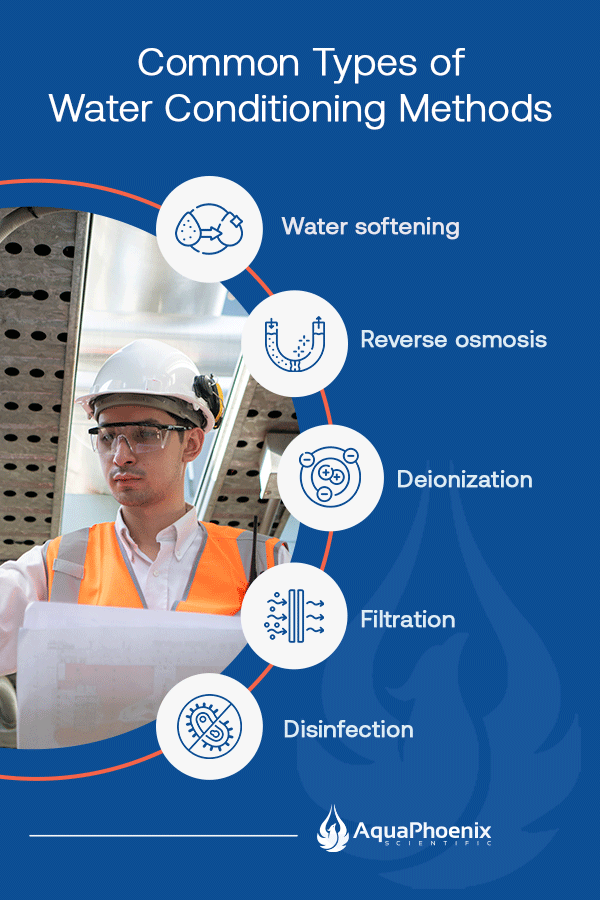
Common Types of Water Conditioning Methods
After testing your water, choosing the right treatment method is the next vital step in the water conditioning process. The following methods can help you reduce or eliminate contaminants and impurities in your water:
- Water softening: Water softening removes minerals such as magnesium and calcium to prevent scale buildup. This is crucial for equipment and components such as boilers and pipes.
- Reverse osmosis: Reverse osmosis uses high pressure to force water through a semipermeable membrane, which separates and removes contaminants. This method is an excellent option for removing salts, heavy metals and VOCs.
- Deionization: Deionization is a chemical treatment method that uses an ion exchange to eliminate dissolved impurities from water. This process passes water through a resin that exchanges charged ions for hydroxyl (OH-) ions and hydrogen (H+) ions. The OH- and H+ ions then combine to form pure water (H₂O). Deionization is an excellent treatment method if your facility’s processes involve heavy amounts of salts and minerals.
- Filtration: Filtration removes particles and suspended solids through straining, screening and clarification. This method is best for removing clay, sand and silt from your industrial water and protecting your equipment from corrosion.
- Disinfection: The disinfection water treatment method uses chlorination, ozone or UV systems to eliminate microbiological contaminants and prevent biological growth. This is the ideal method if you need to address disease-causing microorganisms such as parasites, viruses and bacteria.
How to Ensure Accuracy in Your Water Conditioning Processes
Remember these essential tips to ensure accurate results in your testing procedures:
- Use clean, appropriate instruments: Different testing kits may require different instruments. Use the correct instruments to avoid compromising your sample. It’s also important to clean and rinse your equipment before and after use to eliminate contaminants from previous tests.
- Calibrate equipment: Calibrate your equipment before each test to ensure instruments measure parameters with precision.
- Follow precise sampling procedures: Every test kit has specific sampling procedures. Follow all steps so you test the right sample type, size and temperature. Each sample should represent your entire system. You should always flush sample lines before collecting samples, and use the correct sample container for proper sizing. A testing kit may also include special instructions such as removing faucet screens or letting a sample sit overnight.
- Document results: Keep accurate records of your sampling dates, test results and corrective actions to track patterns and make informed decisions.
- Trust trained technicians: Only trained technicians should test your water. Ensure individuals performing tests have the appropriate training and experience with each method.
Enhance Your Water Testing Methods With AquaPhoenix Scientific’s Test Kits
Water testing is a vital part of the water conditioning process. Choosing the right system for testing and treatment is essential for protecting your equipment, increasing operational efficiency and maintaining your water’s safety. AquaPhoenix Scientific offers high-quality water testing kits, reagents and equipment, helping you achieve accurate results and make the most informed decisions for your water and equipment.
As a leading manufacturer of high-quality industrial water testing supplies, AquaPhoenix Scientific understands what you need to perform your job effectively. Browse our catalog of water testing products, or contact us to learn more about how we can enhance your water conditioning processes.


Water is becoming increasingly precious as climates change and populations continue to grow. Many areas are projecting drastic changes to their water consumption and wastewater production in the coming years. With changes in volume will come changes in quality as well. Your wastewater will have new contaminants and varying concentrations of current contaminants as your population changes. To meet these demands, wastewater treatment plants (WWTPs) will need to be as efficient as possible to remain profitable and serve their communities’ needs. Following a few steps can increase your water treatment plant’s efficiency and better prepare your facility for the future ahead.
The Importance of Water Treatment Efficiency
 Too often plants treat efficiency as a nebulous metric that should always be measured for improvement. As a result of this goal always being present but never fully understood, water treaters push it to the back of their mind. They know that they want to increase the efficiency of their water treatment systems, but they do not understand the value of meeting that goal. Enacting a focused plan to improve efficiency of your water treatment will lead to benefits for your business and the surrounding community. Increased water treatment efficiency helps protect the environment, keeps your WWTP within regulations, and keeps your facility modern.
Protects the Environment
Wastewater treatment plants directly affect the environment around them. The effluent they discharge can alter the chemistry of the surrounding aquatic environments, impacting the health of flora and fauna. For example, an excess of ammonia, nitrogen, or phosphate could result in algae blooms or eutrophication of surrounding waters. Maintaining an efficient wastewater treatment program ensures you are releasing high quality effluent consistently, minimizing the impact to natural waters. Improving efficiency also protects the environment in a less direct way. A more efficient WWTP will consume less energy and water treatment chemicals, which decreases the carbon footprint of your facility.
Meets Regulations
Most wastewater treatment plants are under strict regulations from the federal and local levels of government. Exceeding the limits set by your permit or other standards could lead to expensive fines. When auditing your treatment systems for efficiency, you will be working within the set limits of your permit. The technologies and processes you establish will naturally help you stay within your regulations. An efficient wastewater treatment facility requires less maintenance and gathers consistent reliable data, both of which will keep you within regulations.
Keeps the Facility Modern
Technology is evolving, and the wastewater industry is no exception. New products such as chemical feed pumps, online analyzers, reverse osmosis systems, and flow switches are helping operators do more with less resources. By including potential upgrades and new technologies in your efficiency audit, you will keep your facility up to date and in-line with the latest practices.
The efficiency of your wastewater treatment program is not just another goal to mention on a checklist. The efficiency of your water treatment is the foundation to creating high quality effluent at the lowest cost to your plant.
The Benefits of Improving the Efficiency of Wastewater Treatment
Efficiency is clearly important to a wastewater treatment plant and the surrounding community, but what are the benefits of being more efficient? The immediate benefit of increased efficiency is cost savings. However increased efficiency will also conserve water, reduce energy consumption, and increase the overall capacity of your facility.

Saves Money
Optimizing wastewater treatment will have an upfront cost, but in the long run it will save money. Don’t view the time, labor, or equipment being used to increase efficiency as a cost. View it as an investment instead. By upgrading your equipment or process, you are spending money to lower costs moving forward. Replacing an aging pump that requires frequent maintenance may be expensive but overtime you can make that money back in labor time saved. The time previously spent on maintenance for the old pump can be put to good use elsewhere in the WWTP. The same thing will occur when replacing an inefficient process with a more streamlined version. It may take some time to implement the new process, but in the end your team will be more efficient and lower the labor cost. Over time the more efficient equipment or method will pay for itself with the savings gained.
Conserves Water
An efficient WWTP helps conserve water for the entire community. Without wastewater treatment, untreated sewage would enter natural water sources until they became polluted to the degree that they could not support life. A municipal wastewater treatment plant with high efficiency will be able to handle spikes in influent and prevent untreated water from entering the environment. The treated wastewater will replenish water sources through being returned to the water board. The effluent will help recharge ground water, streams, and rivers conserving water for your community.
Reduces Energy Consumption
Removing organic matter, microbes, suspended solids, and chemicals from water takes energy. The efficiency of your water treatment correlates to how much energy is utilized. As you work to improve the efficiency of your onsite wastewater treatment, you will actively reduce your energy consumption. Most technologies and strategies you will implement will be more energy efficient than your current implementation. Using less energy will lower your wastewater treatment cost and make your process more environmentally friendly.
Increases Capacity
 Most operators imagine building more tanks or increasing the footprint of their plant when they imagine increasing capacity. However, by optimizing your processes you can increase capacity without building extensive infrastructure. When improving efficiency, you will likely ease bottlenecks you had previously. Opening the bottlenecks will allow higher flow rates through your system, improving the overall capacity of your treatment process.

7 Steps to Enhance the Efficiency of Your Wastewater Treatment Plant
1. Assess Current Performance
The first step to improving efficiency is understanding how efficient your plant is now. Sit down and consider what metrics you use to evaluate your efficiency. Frequently used key performance indicators (KPIs) include amount of chemical used, maintenance to operation time ratio, and energy consumed, but each plant will have their own KPIs. You don’t want to have too many KPIs, but you should touch on the important aspects of your facility. Once you have decided on your KPIs you need to gather baseline data for each one. Try to gather 2-3 months of data and account for seasonal changes. With reliable baseline information you will be able to set reasonable goals for your plant and determine the true impact of the changes you implement.
2. Inspect Flow Rates
Flow rates are particularly important to a wastewater facility and deserve a special mention. A common area to find bottlenecks are with water pumps in the treatment process. Pumps that are not working at peak efficiency can lead to increased cost and potential problems further in the system. If you were not already tracking your pump’s discharge rate, be sure to start now. You want to ensure that you are using an appropriate capacity pump. Too small and you may not meet peak demand, too large and you may be wasting energy. If you notice that the flow rate is lower than expected, it could be due to leaks, clogs, or worn-out parts in the pump. Depending on the problem the pump may require maintenance or an entire replacement.
3. Evaluate Infrastructure and Technology
Once KPIs are identified it is time to evaluate the technology and infrastructure the plant is utilizing. Audit the performance of your plant from influent to effluent and evaluate the equipment at each step. Check the age and effectiveness of your equipment both large and small. Review pumps, filters, feed and control equipment, and flow switches but also large pieces like reverse osmosis systems, settling tanks, and aeration systems. Don’t forget technology infrastructure like modems either. These keep your devices connected to the internet and offer secure connections. If any piece of the process is underperforming, assess why and determine if you are able to correct the issue with maintenance or if it is time for an upgrade.
4. Consider Upgrading Your Equipment
Some of your equipment may be out of date and require an upgrade. Consider how much maintenance a piece of equipment requires. Also ask yourself if it is creating a bottleneck for the rest of your water treatment process. If either of these answers is yes, it might be time to consider upgrading. Much of your WWTP’s technology was put into place when your community’s population level and wastewater make-up was different. Even if it is still functional, you may be more efficient performing an upgrade now. Research what your options are. If equipment is 10+ years out of date, there may be an energy efficient version or even alternative.
5. Implement New Systems and Technology
Identifying and implementing new technology to areas needing improvement can be difficult. This can be a struggle is that you need to be aware of the possibilities of these items prior to your review. You may not realize that new developments have been made in water treatment that could streamline your process. For example, your activated sludge process may be functional but new technologies like Membrane Aerated Biofilm Reactors (MABR) may be more efficient for your treatment system. Keep an open mind to new technologies and do your best to stay informed on new industry developments.
Integrating a new system or technology can be difficult and the upfront cost may be high, but through better energy efficiency, saved labor time, and reduced maintenance time an upgrade will pay for itself.
6. Automate Your Operations
The ability to automate processes in wastewater facilities has grown in recent years. Complex software now has simplified user interfaces and mobile apps for added convenience. The technology is poised to leap forward again with the introduction of AI predictive models. When reviewing your systems, determine if your process could be automated to save labor cost and time. Feed and control software can help you automate dosing of chemicals while data management platforms allow you to automate report generation. Automation will make your plant more efficient by reducing the time your operators have to spend on simple tasks and allow them to tackle the more complex issues where their expertise is required.
7. Review the Data
Once you have made a change to optimize your wastewater treatment you must collect and record the necessary data to verify that the improvement is working as intended. Too often operators implement a change and do not review the data to determine how successful the change is. Refer back to the baseline data you gathered during your audit. Consider the direct change as well as secondary effects like saved labor or energy. If your modification has alleviated a bottleneck, you may find that your data will reveal new areas for improvement. This information can also help you secure further funding for other improvements.
How Feed and Control Equipment Boosts Efficiency
The right feed and control equipment can provide a big boost to your WWTP’s efficiency. Feed and control metering pumps act as the primary delivery system for liquid chemicals. High-quality chemical feed pumps can accurately and safely deliver the required quantity of product to the treated system. These pumps are programmed with a computer called a controller. The pumps can be programmed to dose chemicals at a set time or as a reaction to conditions in the water. These features will increase chemical dosing accuracy and conserve resources for your wastewater treatment facility.
Increases Dosing Accuracy
 A quality feed pump and controller can increase your dosing accuracy. With today’s technology pumps can be programmed to very specific conditions. When paired with an accurate measurement of water quality, an operator can program their pump to dose the exact quantity of chemical needed to keep the water quality consistent. This removes the chance of operator error in measuring and does not require someone to spend time manually dosing the system. With remote monitoring and wireless technology, operators can adjust pumps from anywhere or pre-program them to keep dosing accurate and efficient. Controllers should be sized correctly to the number of inputs and outputs required and can integrate easily into your data management software.
Conserves Resources
Having the appropriate control and feed equipment will conserve resources across the wastewater treatment process. Accurate dosing will prevent wasted chemicals while wireless access and programmable pumps will conserve labor hours. When paired with the appropriate data management software, you can save time and labor generating reports as well.
Achieve Greater Wastewater Treatment Efficiency with AquaPhoenix Scientific
AquaPhoenix Scientific is here to assist you with your efficiency goals. We manufacture and distribute wastewater supplies from reagents to equipment. Whether you need reagent for your testing lab or customized chemical feed and control systems, AquaPhoenix is here to be your one source for testing needs.
Connect with our team today to save time in the field and improve your service visits. Download our industrial catalog to browse thousands of products or request a quote to get started on your next job.