
Introduction
Q1 2024 was a busy time at CHEMetrics! We have made a lot of updates to our product lines and website to help increase our production flexibility, response time, order accuracy, and on-time delivery. These changes encompassed product labels, packaging, new products, and part # retirements. To help make sense of the different part number changes, we thought a summary might help!
Discontinued Part #s
Several CHEMetrics’ part #’s were “retired” in Q1 2024. These changes were part of an effort to streamline manufacturing processes, increase regulatory compliance, and improve our inventory management.
Table 1 lists the discontinued part #s, with their corresponding direct replacement product. Note that although the accessory solution packs (A-xxxx) and CHEMets refill (R-xxxx) catalog #’s are changing, the kit part #s (K-xxxx) they are components of, are NOT changing.
The formulations for the impacted products have NOT changed. The direct replacement is identical to the discontinued products. This means that there is no analytical performance difference between the discontinued product and the replacement.
Historically components were assigned analyte specific part #s even if they were identical. Now, we offer a single part # for all test kits, rather than separate ones.
For example, catalog #s A/S-1600 (bromine), A/S-5501 (hydrogen peroxide), A/S-7400 (ozone), and A/S-7900 (peracetic acid), share identical reagent formulations. These part #s have been replaced with a single part # A/S-2500.
Similar part numbering consolidation is occurring for CHEMets refills. For example: R-7904 was a Peracetic Acid CHEMets refill that was labeled “R-7904 Peracetic Acid”. It is now labeled as “R-7904 Bromine/PAA/Peroxide” because these analytes now share the same CHEMets refill part #.
Table 1: Discontinued products and Replacements

New Products as a Result of This Change
Technically, A-6900 (cadmium) and A-6905 (zinc) foil packs are not new products. They used to be packaged with their corresponding R-6902, R-6904 and R-6905 nitrate CHEMets refills. Now that R-6902/6904 and R-6905 part #s are retired and replaced with R-7002, (refer to Table 1), these foil packs are being packaged separately.
NOTE: This means that when nitrate customers want to re-order their consumables, they MUST use two part #s when ordering – R-7002 PLUS A-6900 or A-6905.
A Note About Catalogs
Many of you have been requesting the CHEMetrics 2024 catalog. Due to these product line changes, we have delayed the launch of our catalog. We will issue the catalog once the product changes are complete. This will ensure you have a reliable catalog.
Questions?
If you have any questions or concerns about these product changes please contact customer service through our website or via phone at 800.356.3072. Thank you for choosing CHEMetrics and keeping Simplicity in Water Analysis.

Two New Filming Amine Test Kits Available
CHEMetrics has developed new test kits utilizing the Rose Bengal chemistry for measuring residual corrosion inhibitors like film forming amines (FFA) in boiler systems.
K-1013 features our Vacu-vials® ampoules and is compatible with a CHEMetrics V-3000 photometer or spectrophotometers that accept a 13mm round cell. This kit comes with enough consumables to conduct 30 corrosion inhibitor tests. Results are provided in ppm Octadecylamine (ODA) or Oleylamine (OA).

K-1006 features our CHEMets® ampoules for visual colorimetric analysis. Color development in the CHEMets ampoule is compared against the provided comparators to obtain a result. This test kit comes with two comparators allowing for measurements in the ranges of 0-2 and 2-6 ppm ODA or OLA. The kit contains everything needed to conduct 30 tests.

Test Kit Applications
Film forming amines, sometimes known as film forming amine products (FFAP) or film forming products (FFP), are used in high pressure boilers, cooling systems, and heat recovery steam generators (HRSGs) to prevent corrosion and minimize corrosion product transport. The Rose Bengal method is a popular test method for measuring these compounds in boiler water or condensate. Under acidic conditions the amines react with Rose Bengal to form a magenta-colored complex in direct proportion to the concentration of simple filming amines such as Octadecylamine (ODA) or Oleylamine (OA).
What are the Benefits of the CHEMetrics Rose Bengal Test?
Rose Bengal is a widely accepted method for measuring filming amines but most commercially available test kits have one key drawback. Rose Bengal dye adheres to glass and labware to the point of staining. Typically, it is necessary to clean glass cuvettes with solvents to prevent introduction of measurement bias. Other labware may need to be dedicated for Rose Bengal use.
With the CHEMetrics self-filling ampoule technology the dye is packaged in the single-use ampoule. No cuvettes are required since the ampoule is used to make the measurement. Staining problems are eliminated. Our convenient corrosion inhibitor test kits save labor and costs associated with solvent cleaning and disposal.
The ampoules contain a premeasured dose of reagent for a single test. After the addition of acidifier solution to the sample simply snap the ampoule in the sample and wait 2 minutes for color to develop to obtain your results.
Rose Bengal Method compared to Methyl Orange Method
CHEMetrics offers two different chemistries for measuring film forming products, the Methyl Orange method, and the Rose Bengal method.

These two methods are very different in their chemistries. Most film forming amine products are proprietary blends of different chemicals. This can make testing for them quite difficult as the components can vary based on the FFA blender/supplier. We encourage customers to try both test methods to determine which one works best for their product and application.
The Filming Amine Test Kits utilizing the Rose Bengal Chemistry are available now. Order online or contact us at 800-356-3072 to place your order today.

What is Changing?
In the coming days you will notice a change to the packaging for all VACUettes products. The VACUettes capillary tips will no longer be attached to the test ampoule. Instead, the tips will now be supplied in a small plastic box packaged alongside the CHEMets refill containing the ampoules. If you are ordering a VACUettes test kit (Catalog Numbers that start with a “K”), the box containing the tips will be inside the plastic case for the test kit. If you are purchasing a VACUettes refill (Cat #’s – beginning with an “R”) the box of tips will be packaged with the CHEMets refill and updated product instructions in a resealable plastic bag.
The part numbers for these products ARE NOT changing for this change in packaging.

An example of the new VACUettes product packaging.
Before performing a test, the VACUettes tip will need to be attached to the tip of the CHEMets ampoule. The updated instructions will detail how to put the tip on the ampoule. Kit instructions are also available on our website on the individual kit and refill product pages.
What’s Next for the VACUettes Product Line?
In the coming months we will be discontinuing the entire VACUettes product line, but we will replace it with a new line of high range test kits. The new line of test kits will offer improved ease of use along with the same direct read convenience that VACUettes tests provided. More information on these new products will be coming soon.
Can I Purchase More VACUettes Test Kits Now?
We will continue to offer VACUettes test kits for several months until our stock runs out. A full list of VACUettes products can be found on this page. You can place orders online at chemetrics.com, through your AquaPhoenix sales rep, or via phone at 800.356.3072.
I Have a Question!
If you have any questions or concerns you can fill out a contact us form or talk to a customer service representative at 800.356.3072. We will continue to update our blog with new information regarding the VACUettes change so please check back soon. We thank you for your business!
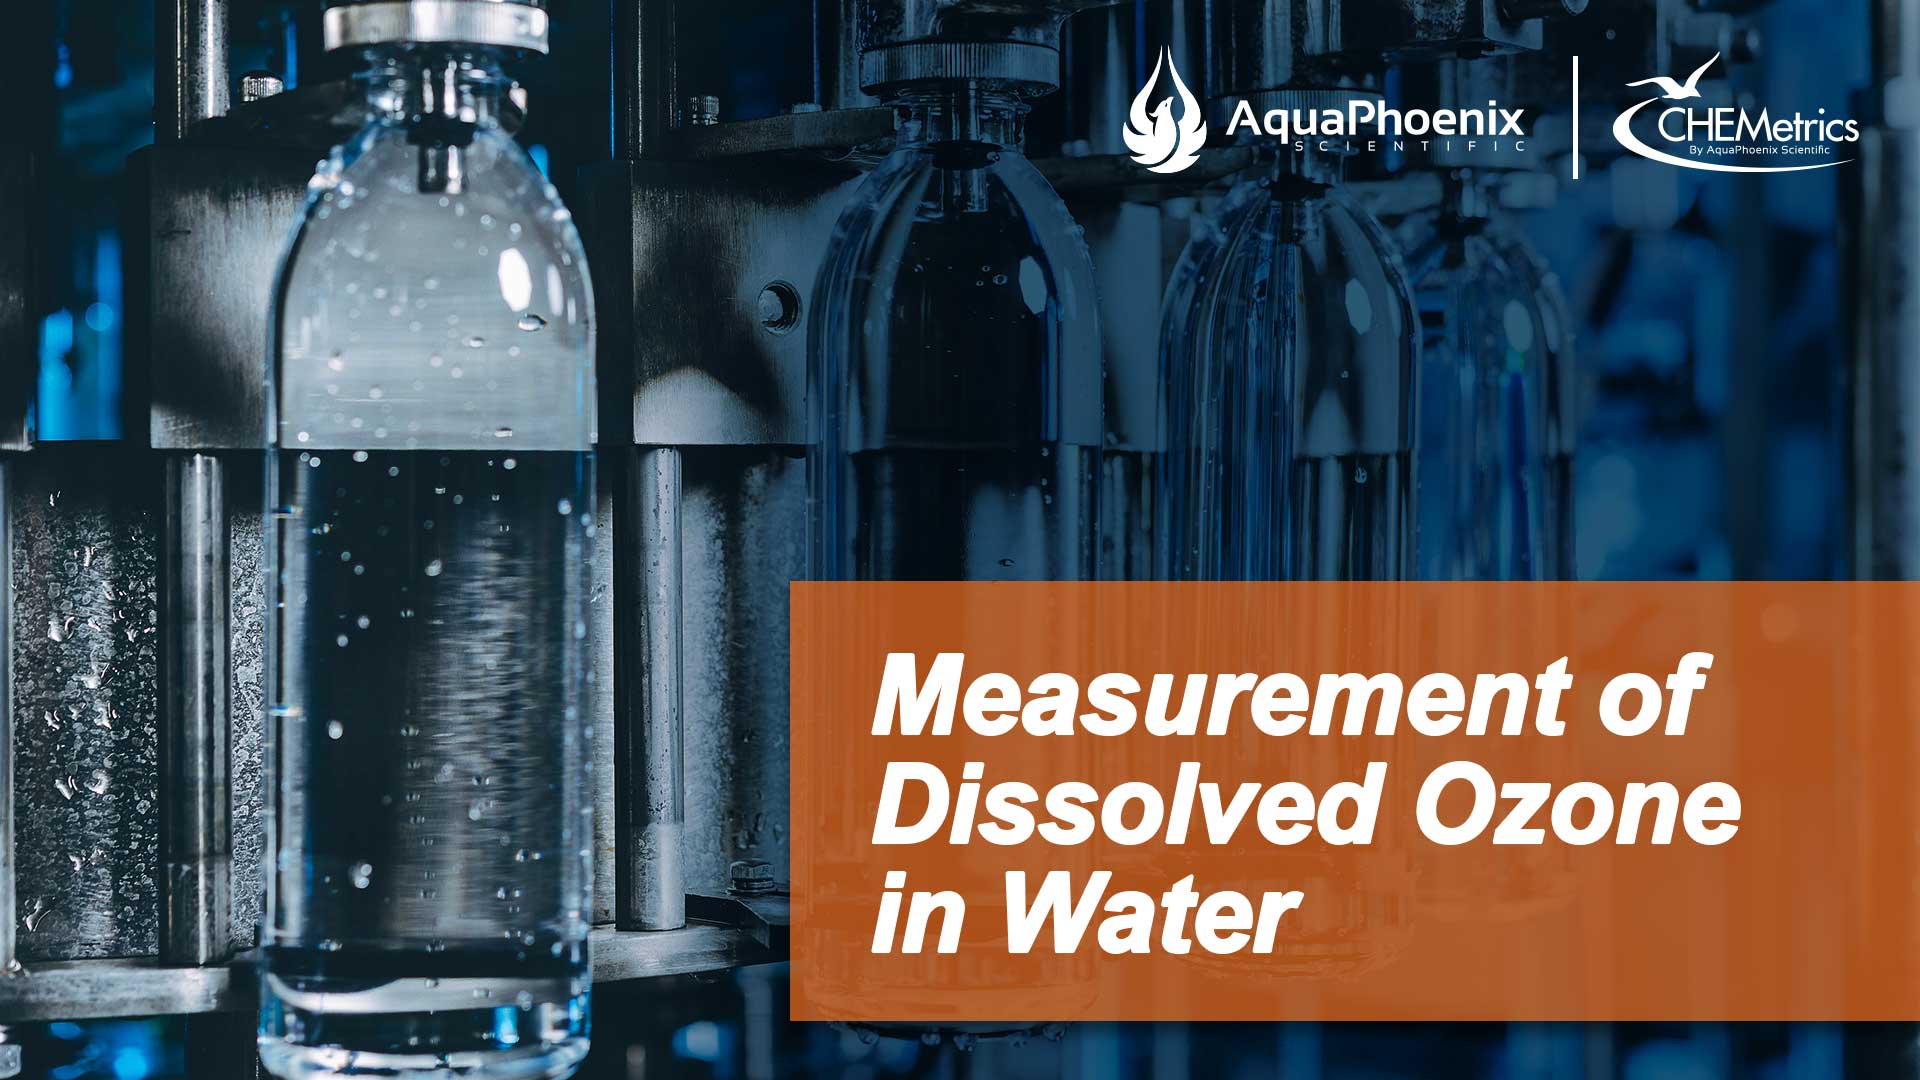
Why Measure Ozone in Water?
Ozone (O3) treatment has become an important tool for water quality engineers. As new more stringent requirements from regulators and customers must be met, ozone is often the oxidizer and disinfectant of choice for a wide range of process applications. Ozonation is used for viral, bacterial, and parasitic disinfection, the removal of taste- and odor-causing compounds, the destruction of refractory/toxic organic matter and the coagulation or oxidation of inorganic impurities such as iron, manganese and sulfides1.
With the rising popularity of ozone in water treatment comes the need for a versatile analytical method for the routine measurement of dissolved ozone in a variety of solution matrices. The indigo trisulfonate method has become a favorite as it is accurate and precise over a wide concentration range, insensitive to interferences, and easy to use and dispose of. This method uses a non-toxic blue dye that is instantly decolorized by ozone. Interference from the most common oxidizer, chorine, can be masked with malonic acid (C3H4O4). The method is described in Standard Methods for the Examination of Water and Wastewater (Method 4500-O3 B)2 and is offered as a product in various forms by a number of companies.
More protective public health standards for drinking water have led to the expansion of ozonation for water treatment. For example, more stringent regulations have been implemented to reduce the concentration of harmful disinfection byproducts (DBPs), such as trihalomethanes (THMs) and haloacetic acids (HAAs), that are formed as a result of disinfection with chlorine and other halogens. Treatment with ozone does not produce DBPs and is therefore preferable. Ozonation is also an effective treatment option in circumstances where disinfection for more resistant pathogens, such as Cryptosporidium oocysts and some viruses, is required. In order for chlorine to be effective at disinfecting the more resistant pathogens, the concentration and/or contact time must be increased beyond what would otherwise be necessary. This tends to increase THM and HAA concentrations to levels that could be dangerous. Some utilities have installed ozone contactors to boost disinfection potential without increasing DBP production. However, conditions can limit the suitability of ozone for water treatment. When bromide ion (Br–) is present in the source water, its oxidation by ozone can result in the production of bromate (BrO3–), a DBP with an EPA drinking water limit of 10 ppb3.
Utilities that choose ozonation tend to have greater customer satisfaction due to improvements in other water quality parameters such as color, taste, odor, and clarity. Ozone also removes dissolved inorganic impurities such as iron, manganese and sulfide through coagulation and oxidation. Ozone can remove these impurities more efficiently than a conventional aerator, allowing reduced coagulant dosage and contact time. Advanced Oxidation, or ozone supplemented with hydrogen peroxide or UV radiation, may be required when oxidation of refractory or toxic organic matter, such as humic acids and pesticides, is required. These compounds are not degradable by chlorine, biological oxidation, or ozone alone. Combining ozone with hydrogen peroxide or UV radiation causes the ozone to degrade rapidly, resulting in a pulse of extremely reactive free radicals.

A sample of water being tested for ozone with a CHEMetrics K-7433 ampoule.
Industrial and Commercial Applications of Ozone
New avenues for the application of ozone in the food industry were opened in 1997 when the U.S. Food and Drug Administration granted “generally recognized as safe” (GRAS) status to ozone. Cleaning fruits and vegetables by washing with ozonated water decreases the concentration and volume of waste, the total water consumption, and contamination by mold and bacteria4. For meat, poultry and seafood, ozone can extend shelf-life and reduce processing costs. Generally, products are sprayed with ozonated water then kept in an ozonated atmosphere to further decrease spoilage.
Ozone treatment is common in bottled water manufacturing. Although production methods vary depending on the size of the operation and quality of the source water, all methods for the U.S. market must produce a product that can pass the U.S. FDA regulations, which are required to be at least as protective of public health as those required by the EPA for public drinking water. Due to the use of filtration, reverse osmosis, activated carbon adsorption, and ozone treatment, there have been no major outbreaks of illness associated with bottled water in the past decade in the United States5.
In a bottled water plant, ozone is added to the water in the final operation just before bottles are filled. Generally, ozone gas is injected into a large tank of water until it reaches a desired concentration after which the water is transferred to the bottle. The ozone concentration must be high enough to kill any organisms, yet low enough that it does not attack the bottle or linger greet the consumer. This is about 0.4 ppm (mg/L) ozone.6 As with public drinking water, ozone may introduce the disinfectant byproduct bromate if the source water contains a significant amount of bromide.
Ozone is also applied as a disinfectant and oxidizer in these applications: aquaculture (nitrite oxidation), pools and spas, soil/groundwater remediation (underground storage tank contaminants), farming, winery sanitation (barrel/tank cleaning), electronics (surface cleaning), cooling water towers, laundry (deodorizing), indoor air pollution (particle removal), and industrial wastewater in general.
Ozone Analysis Using Sensors and UV Equipment
The techniques for measuring dissolved ozone can be divided into two methods: instrumental and colorimetric. The three main instrumental methods are: Oxidation/Reduction Potential (ORP), membrane probe, and UV absorbance. These methods all offer the advantage of giving continuous readings, and they avoid ozone degassing during sampling when used in-line. The instruments are generally calibrated using colorimetric methods, except for the UV absorbance method.
The ORP method measures the voltage generated by ozone in the solution at a platinum electrode relative to a standard reference electrode. It requires very clean water with at most moderate turbidity.
Classical Wet Chemistry Methods for Measuring Ozone
The three main wet chemistry methods for measuring ozone in water are: iodometric titration, N, N-diethyl-p-phenylenediamine (DPD) and indigo trisulfonate.
Iodometric Titration Method
In the iodometric method, ozone reacts with potassium iodide (KI) to form iodine (I2), which is then titrated with thiosulfate to a starch indicator endpoint with the sample buffered to pH 2. However, this method requires training and skill as the stoichiometry of the reaction is sensitive to pH, buffer composition and concentration, iodide ion concentration, sampling techniques, and reaction time7.
DPD Colorimetric Chemistry
In the DPD method, ozone reacts with potassium iodide (KI) to form iodine which then reacts with DPD to produce a pink compound. The intensity of the pink color is proportional to the ozone concentration and is measured at about 515 nm on a colorimeter or spectrophotometer. Iodometric and DPD methods have the disadvantage that they cannot discriminate between ozone and other common oxidizers. Several vendors manufacture colorimetric test kits that utilize DPD/KI in either powder or tablet form. However, the sample manipulation required to dissolve the tablet or powder can cause a loss in measured ozone concentration. This drawback is minimized by an ozone test kit with a liquid KI reagent that is added to the sample with a dropper bottle. This method, manufactured only by CHEMetrics, also uses a liquid DPD reagent packaged in a unit-dose glass ampoule sealed under vacuum. The reaction takes place inside the ampoule which increases the overall accuracy and precision of the method. The method is applicable to samples that do not contain chlorine.

K-7423 utilizes the DPD chemistry. Vacu-vials ampoules work with Single Analyte Meters (sold by CHEMetrics) or any spectrophotometer that accepts a 13mm round cell.
Indigo Trisulfonate Colorimetric Chemistry
The indigo trisulfonate method has several advantages over the other two techniques. According to Standard Methods, “The indigo colorimetric method is quantitative, selective and simple. The method is applicable to lake water, river infiltrate, manganese-containing groundwaters, extremely hard groundwaters, and even biologically treated domestic wastewaters.” Indigo trisulfonate is usually sold as the potassium salt. The purity of indigo trisulfonate may vary between vendors and even between different lots from the same vendor. Both purity and age of the indigo trisulfonate have been shown to affect the stoichiometry of the reaction with ozone.8 High purity indigo trisulfonate (>80%) has a molar absorptivity of about 20000 M-1cm-1 at 600 nm.
The method is based on the decolorization of the indigo dye by ozone. The loss of color is directly proportional to the ozone concentration. The sample is generally adjusted to near pH 2 to minimize destruction of the ozone by reaction with hydroxide ions. The most common analytical procedure subtracts the absorbance of indigo trisulfonate after reaction with a sample from that of an ozone free blank. Chlorine decolorizes indigo trisulfonate at a moderate rate, but this can be significantly slowed by the addition of malonic acid.
Oxidation products from the reaction of the manganous ion (Mn+2) with ozone can destroy indigo trisulfonate. To measure ozone in the presence of manganous ion, glycine is added to a sample to selectively destroy the ozone, then indigo trisulfonate is added to measure the apparent ozone concentration due to the reaction with manganous ion oxidation products. This value is subtracted from the value obtained from a sample without glycine added.
Indigo Trisulfonate Test Kits
CHEMetrics is a major manufacturer of indigo trisulfonate test kits. The kits feature self-filling reagent ampoules that contain the active ingredients potassium indigo trisulfonate and malonic acid. The malonic acid in the reagent prevents interference from up to 10 ppm chlorine. The ampoules contain a liquid reagent, advantageously allowing the dissolved indigo trisulfonate to instantly react with the ozone in the sample as it is drawn into the ampoule.
CHEMetrics’ indigo ozone product measures an ozone concentration range of 0-0.75 ppm. The ampoules have a 13 mm diameter and are compatible with most spectrophotometers.
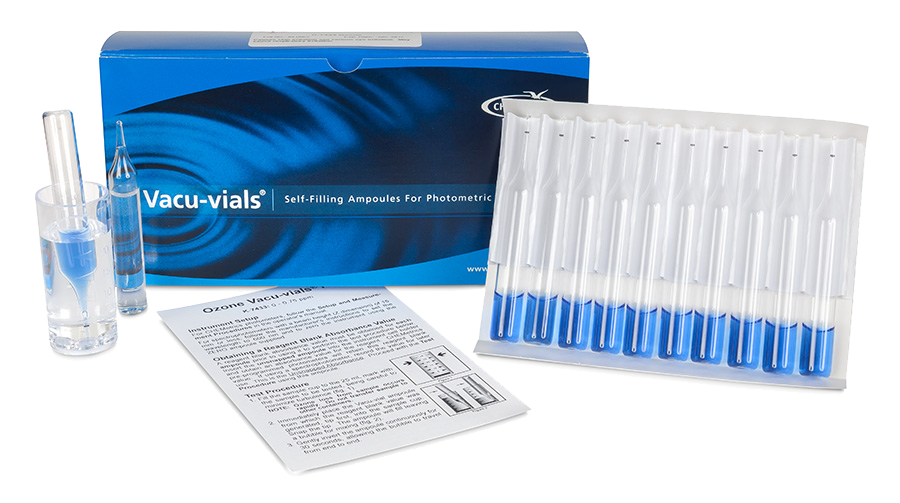
K-7433 utilizes the indigo trisulfonate chemistry. Each ampoule can self-zero for simplified testing.
Since the ozone concentration is measured by the loss of indigo trisulfonate, both initial and final absorbance measurements are required. To accomplish this, the CHEMetrics product uses a “self-zeroing” method that measures the absorbance of the same ampoule before and after sampling, eliminating the need to generate an initial indigo trisulfonate absorbance ampoule each time a test is run. The initial absorbance measurement, before taking in the sample, is divided by a factor that takes into account the dilution once the ampoule has filled. The difference between the initial absorbance divided by the factor, and the absorbance after sampling, is converted to ozone concentration. A direct read photometer, called a Single Analyte Meter, is available that automatically makes all appropriate calculations.
References
- Rakness, K., (2005) Ozone in Drinking Water Treatment: Process Design, Operation, and Optimization.
- Standard Methods for the Examination of Water and Wastewater, 22nd ed. (2012) 4500-03 B, 4-145 .
- Haag, W. R., and J. Hoigne (1983) Ozonation of bromide-containing waters: kinetics of formation of hyprobromous acid and bromate. Environ. Sci. Technol. V17, p 261.
- Spartan Environmental Technologies, LLC, Tech. Bulletin TA-112064.
- Edberg, S., Microbial Health Risks of Regulated Drinking Waters in the United States: A Comparative Microbial Safety Assessment of Public Water Supplies and Bottled Drinking Water (2013) Drinking Water Research Foundation, 31 p.
- Bollyky, L. J., Benefits of Ozone Treatment for Bottled Water (2001) http://pacificozone.com/wp-content/uploads/2014/04/app_1388591099.pdf.
- Langlais, B., D.A. Reckhow, and D.R. Brink eds. (1991) Ozone in Water Treatment: Application and Engineering. Chelsea, Mich.: Lewis Publishers, Inc.
- Gordon, G., R. Gauw, Y. Miyahra, B. Walters, and B. Bubnis (2000) Using Indigo Absorbance to Calculate the Indigo Sensitivity Coefficient. Jour. AWWA, V92, pp. 96-100

What Is a COD Test?
A Chemical Oxygen Demand, or COD test, measures how much dissolved oxygen (DO) is consumed by the oxidation of organic matter and inorganic compounds such as ammonia or nitrite under controlled conditions. COD is widely recognized as an indicator of wastewater influent and effluent quality. COD analysis is typically performed using the UESPA accepted dichromate reactor digestion method. This method has a water sample react with a mixture of sulfuric acid and potassium dichromate in a sealed container and then digested for 2 hours at 150oC. The sample is then read in a spectrophotometer to determine the results. You can often find Chemical Oxygen Demand tests supplied in screw top vials that contain a premeasured sulfuric acid and potassium dichromate mixture. You can find all of our COD product offerings on our COD test kits page.

Figure 1: CHEMetrics COD vials come in packs of 25 or 150 (98 for HR+).
How to Perform a COD Test
COD analysis can take over two hours to perform due to the digestion required, so ensuring that you’ve followed the test method correctly can save you a lot of wasted time. The video below shows you step by step instructions on how to follow COD lab test procedures with any of the CHEMetrics COD test kits. If you prefer step-by-step instructions continue reading below.
COD Test Lab Test Procedure
An easy-to-use printout of our instructions comes with every pack of vials and is available on our website.
- Homogenize 500 ml of sample for two minutes in a blender to ensure an even distribution of solids throughout the sample. This will ensure regular results and prevent wild variations between vials.
- Preheat the digestor block to 150oC (302oF).
- Remove the cap from each COD vial. Store the vials in a vial rack to prevent any spillage.
- Pipet two milliliters of sample into each vial. Be aware that adding the sample will cause an exothermic reaction and the vial will become hot. Just another reason to ensure you are wearing the proper safety equipment!
- If you are using a high range kit (CHEMetrics: K-7370S, K-7375, K-7371S, and K-7376) pipet 0.2 mL instead.
- Secure the cap onto each COD vial. Be sure not to overtighten the cap as it could damage the closure.
- Immediately invert each vial ten times while holding the vial by the cap only as the vial will be hot from the reaction caused when adding the sample.
- Prepare the reagent blank by removing the COD vial cap and pipetting deionized water rather than sample into the vial. Make sure that the reagent blank vial is the same lot number as the test vials.
- Note: At least one reagent blank must be run with each set of samples with each new lot number of COD test vials.
- Wipe the vials with a damp towel to remove smudges and fingerprints from the vial and place them in the preheated digestor block.
- Allow the vials to heat in the digestor block at 150oC (302oF) for two hours.
- Once the two hours are finished, turn the digestor block off and allow the vials to remain in the unit for 15 to 20 minutes to cool. Remove the vials and return them to the vial rack. CAUTION: the vials will still be hot.
- Ensure all caps are secured tightly, then invert each vial several times. Be aware that hot vials may shatter if dropped or cooled rapidly.
- Store the vials in the dark for 30 minutes as they cool to room temperature.
Obtaining the Results of Your COD Test
When obtaining results, the analyst may use a CHEMetrics photometer, or any other manufacturers’ spectrophotometer. Before moving on, wipe down the reagent blank and test vials until they are clean and dry.
CHEMetrics V-2000 Photometer Instructions:
- Install the 16 mm sample cell adapter into the photometer and power it on.
- Insert the ZERO vial into the V-2000, cover it with the light shield, and press the zero key.
- Enter program 48 to read low-range COD test vials or program 49 for high-range or high-range plus COD vials, then press the yes key.
- Press setup and use the arrow keys until “BLANK” is displayed, then press yes
- When “SET BLNK?” appears, press yes.
- When “SAMPLE?” appears, insert the reagent blank COD vial, cover with the light shield, and press yes. The display will briefly show an absorbance value, then move to the next function.
- Press the measure key to exit the setup menu
- Remove the reagent blank vial, insert the test vial, cover with the light shield, and again press the measure key. The instrument will read the vial and display the test result which may be logged manually.
- For high range plus COD Vials, multiply the result by 10.
- For instructions on logging COD analysis results manually or automatically to the memory, see the V2000 operator manual.

Figure 2: A V-2000 can read multiple CHEMetrics tests including COD
CHEMetrics A-7320 or A-7325 Single Analyte Meter:
- Press the power key. The display will show “cod”.
- Insert the COD reagent blank into the sample compartment and press the Zero/Test key. The “cod” symbol will flash for approximately eight seconds.
- Insert the COD test vial into the sample compartment making sure it’s properly seated and again press the Zero/Test key.
- The “cod” symbol will flash for three seconds, then the sample test result will appear in the display as part per million COD. Record the test result.

Figure 3: A Single Analyte Meter Reading a COD Test
Other Spectrophotometers:
For other brand spectrophotometers, refer to the specific instrument’s operator manual for appropriate set-up instructions. Use a 420 nanometer wavelength for low-range COD vials or a 620 nanometer wavelength for the high-range and-high range plus vials. Refer to CHEMetrics COD analysis instructions for range-specific calibration equations to convert absorbance values to test results as part per million COD.
Conclusion
Chemical Oxygen Demand testing can be time-consuming so understanding the ins and outs of the lab test procedures before you run one can prevent headaches further down the line. When performing these tests, it is recommended that analysts use COD standards of known concentration to verify instrument performance and accuracy of test results. CHEMetrics offers the A-7301 1000 ppm COD calibration standard as well as the A-7310 10,000 ppm COD calibration standard. For questions about how to run this or any other CHEMetrics test, please contact us or call us at 800.356.3072 and ask for technical support.
What Is a Comparator?
A comparator is a set of sealed ampoules containing color standards made of dye mixtures that closely match the color (hue) and intensity of CHEMetrics test ampoules when the tips are snapped in solutions of corresponding analyte concentrations.
By sealing the dyes in ampoules, we can more closely recreate the color generated in the test ampoules. CHEMetrics offers two types of comparators:
- A round comparator is cylindrical and is viewed through the length of the ampoule for low range measurements.
- A flat comparator is viewed through the width of the ampoule on a white background for high range measurements.
Follow these recommendations to obtain the most accurate readings using a comparator.
First Consider Your Light Source
The color of an object is affected by the light source. Fluorescent lighting is often appropriate for optimal color matching; however, LED and natural outdoor light sources are adequate. If taking multiple readings, it is best to keep the light source as consistent as you can. Reading the comparator requires a moderate light source, like normal indoor lighting. Some sources, like full sunlight, can be too intense and may require some shade.

Figure 1: An operator reads a flat comparator under LED lights in a lab.

Figure 2: The operator reads the same comparator in Figure 1 outside.
Reading a Round Comparator
When reading a low range comparator, insert the ampoule, flat end first, into the comparator, point the comparator toward the light source and view from the bottom. Align the test ampoule directly above the color standard with the lowest concentration. Then slowly turn the comparator counter-clockwise until the intensity of the test ampoule’s color appears to be the same as a color standard or in between those of two-color standards. To help see subtle differences in intensity change the angle of the comparator slightly back and forth while rotating the comparator slowly. If the reading is between two color standards, consider where the intensity of the test ampoule falls between the two. The easiest way is to estimate by using fractions like halfway (1/2) between the color standards or 1/4th. Once you’ve determined a fraction, you can convert it to a concentration by multiplying it times the concentration difference between the adjacent color standards, and either adding this value to the concentration of the lower color standard or subtracting it from the concentration of the upper color standard, whichever it is closest to.
For example, here’s a scenario where a reading is a little more intense than the nearest color standard. The reading falls between 0.6 and 0.8 ppm. The analyst interprets the reading as being ¼ (or converting that to a decimal, 0.25), darker than 0.6 ppm. So, [0.25 * (0.8 – 0.6)] + 0.6 = 0.65 ppm.
If your reading is more intense than the highest color standard of the comparator, this means that the sample concentration is higher than the range of the round comparator. When available, compare the test ampoule to the flat comparator included in your test kit.
Reading a Flat Comparator
When reading a high range comparator, it is very important to hold it in a manner that eliminates glare and reflection from your light source. This can be accomplished by angling the comparator relative to the light source until the light reflection disappears. Some analysts prefer to hold the comparator, so the bubble is at the top of the ampoule while others like to angle the top of the comparator down to make the bubble disappear into the body of the comparator. Either method will work, but the latter method presents the color standard with a longer continuous color with which to match the test ampoule.
Next, the test ampoule should be placed between the first and second color standards at the left (lower concentration) end of the comparator and progressively moved to the right until the intensity of the test ampoule appears to be the same as or in between two-color standards. Move the test ampoule one color standard further to the right to be sure its intensity is less than the color standard now to its left. If it is not clearly less intense than the color standard to its left then it is probably very close to, or equal to, that intensity. Make sure to vary the angle of the comparator to ensure that the intensity is really the same and it’s not a glare or shadow affecting the intensity. Once you are sure of the intensity you can get your reading in the same manner as with the low range comparator.
If your reading is more intense than the highest color standard of the comparator, the sample concentration is greater than the range of the flat comparator. Manually dilute your sample if appropriate or use a higher range test kit.
Color Matching Tips

Figure 4: A round comparator with a poor color match.

Figure 3: A round comparator with a strong color match.
Sometimes the color match between the test ampoule and the color standard is not ideal due to color impurities or turbidity in the sample. When this happens, it is important to distinguish the intensity of the color caused by the analyte from the color caused by the impurity.
CHEMetrics A-0004 Comparator Light Source
CHEMetrics offers a self-contained light source, or CLS, which incorporates an LED light with an adapter that is designed to be used with a round comparator. This device makes it easier to obtain test results in low-light environments such as power plants or any industrial setting where lighting conditions are poor.
Simply attach the CLS accessory to your comparator to illuminate the color standards. The CLS has been validated for use with CHEMetrics C-7518, C-7540 and C-7599 ppb Dissolved Oxygen and C-1001 Filming Amine comparators.
Conclusion
Our eyes are very good analytical “instruments”. CHEMetrics visual test kits permit water analysis measurements at very low analyte concentrations that rival laboratory optical equipment. Although reading a comparator is a simple task whether you are working in the field or the lab, new users may need some practice manipulating the test ampoules in the comparators to determine for themselves the techniques that work best for them. Check out the video tutorial below and if you have any other questions please contact us.
Food and beverage packaging takes many shapes and forms in today’s marketplace. In an effort to maintain grocery shelf-life and flavor quality, these products are processed and assembled by sophisticated packaging equipment that has evolved away from traditional bottling and canning methods.
Systems of quality control in the food and beverage industry have become more sophisticated as well as companies have come under the FDA’s Hazard Analysis and Critical Control Points (HACCP) guidelines. They call for food companies to develop quality monitoring procedures at critical control production points. Furthermore, corrective actions must be identified and taken if established limits are not met. Lastly, effective recordkeeping of food safety monitoring must be maintained to document the various HACCP-mandated processes.
Aseptic Packaging
Aseptic packaging technology utilize both hydrogen peroxide and heat to achieve sterility enabling food products to be distributed through ambient temperature channels. FDA approved these processes in January 1981 in response to a petition by Tetra Pak. Within months, some of the largest U.S. beverage producers (juice, dairy, etc.) began employing aseptic packaging sterilization procedures. Although new to the U.S. at that time, the technology’s origin can be traced to Sweden’s Tetra Brik packaging introduced in 1963.

Figure 1: A close up of a bottling line
Extended Shelf Life
The chilled food and beverage segment of the market has boomed since the 1980s as packaging engineers have employed variations on the “aseptic theme” to produce systems that prolong shelf life beyond that of traditional pasteurized products (hence extended shelf-life or ESL). Although ESL processes apply a heat/time regimen to the product that is regarded as a sterilization process, ESL packaging operations do not necessarily sterilize the packages or package enclosures, therefore all ESL products are distributed through refrigerated channels. Examples of ESL products offered in the refrigerated section of the grocery store are orange juice (not from concentrate), flavored milk, coffee creamers, and puddings.
General Protocols Used in Packaging Systems
Regardless of the food packaging system being considered, packaging vendors apply the same basic microbiological and engineering principles to design their food safety monitoring equipment. Precise details of the processes are dictated by the product type – high acid or low acid (aka pH). The general procedures used to sterilize either the product or packaging systems before any product or package enters the system involve:
- steam
- steam plus hydrogen peroxide
- hydrogen peroxide
- peracetic acid
- other chemical treatments, or
- hot water.
When chemical sterilization is applied to package interiors or closures, residual chemical must be removed prior to filling not only to comply with FDA residual regulations but also to maintain sensory quality and prevent flavor degradation.
Hydrogen Peroxide Measurement, Monitoring and Control
In 21 CFR 178.1005 (a) of the Code of Federal Regulations, hydrogen peroxide is defined to be a 35% aqueous solution. In subsection (d) of this same standard, it specifies limits on the hydrogen peroxide residual. “No use of hydrogen peroxide solution in the sterilization of food packaging material shall be considered to be in compliance if more than 0.5 part per million of hydrogen peroxide can be determined in distilled water packaged under production conditions (assay to be performed immediately after packaging).”

Figure 2: Within facilities of this size there may be more than one testing location.
Analytical Tools for the Detection of Hydrogen Peroxide
The traditional laboratory bench method used to determine hydrogen peroxide levels is a titration with potassium permanganate (KMnO4). This requires volumetric glassware, use of buret, and standardization of the KMnO4 prior to testing. Typically, titrations are repeated up to three times to determine an averaged test result. In the manufacturing arena, where it is not uncommon for lines to produce hundreds of bottles per minute, waiting for a lab result to confirm residuals is costly.
Paper hydrogen peroxide test strips offer advantages over titrimetric methods. Typically, a strip is dipped in a sample for a specified time, removed and allowed to stand while a color reaction develops on the reagent pad. The developed color is then matched to a printed color standard. One disadvantage of paper test strips is that they are deactivated by moisture. Care must therefore be taken to prevent exposure of the strips to air.
Even under ideal conditions, hydrogen peroxide test strips have a limited shelf-life. Furthermore, test strips may not offer the sub-ppm sensitivity required for residual testing. Lastly, test results may be influenced by user technique – for example, how vigorously the strip is stirred in the sample, and the degree to which the sample is allowed to drain from the strip once the strip is removed from it.
About CHEMetrics
CHEMetrics manufactures an innovative, colorimetric hydrogen peroxide test kit that is economically priced and offers:
- immediate test results (in less than 2 minutes) at the point of testing, not in the lab
- long term reagent stability
- sub ppm sensitivity, and
- accuracy independent of user technique.
In this analytical system, the hydrogen peroxide liquid reagent is pre-dosed and packaged in a vacuum-sealed ampoule. In the visual test kit, the CHEMets® ampoule tip is immersed in the sample, the tip is snapped off, and the sample is automatically drawn into the ampoule. After the ampoule is inverted several times to facilitate mixing, it is compared to color standard ampoules to obtain a test result. An instrumental version of this hydrogen peroxide test kit is also available. The same test procedure is followed except that the ampoule (Vacu-vials®) is read in a photometer rather than compared visually to color standards.

Figure 3: CHEMetrics offers both visual and instrumental test kits for the measurement of Hydrogen Peroxide in Water.
CHEMetrics offers a variety of methods and test kit configurations that permit the measurement of hydrogen peroxide concentrations ranging from sub ppm to percent levels. The analytical method that is most widely used by food and beverage customers for hydrogen peroxide food safety is the ferric thiocyanate chemistry. In this chemistry, the ampoules contain a ferrous ammonium thiocyanate reagent. Hydrogen peroxide in the sample converts ferrous ammonium thiocyanate to ferric thiocyanate. The intensity of the orange-brown colored ferric thiocyanate is proportional to the hydrogen peroxide level in the sample. Test results are obtained in two minutes or less. The measurement range for the ferric thiocyanate CHEMets® test kit (visual) is 0 – 0.8 ppm and 1 – 10 ppm, with a detection limit of 0.05 ppm. The measurement range for the ferric thiocyanate Vacu-vials® test kit (instrumental) is 0.15 – 6.00 ppm, with a detection limit of 0.15 ppm. VACUettes® kits are also available in which the ampoules have been fitted with an auto-dilutor tip, thus allowing for measurement up to 1.2% (12,000 ppm) hydrogen peroxide.
Other CHEMetrics kit options available for measuring high levels of hydrogen peroxide (up to 20%) employ a titrimetric ceric sulfate reagent and a ferroin indicator. Titrets® ampoules employ a reverse titration method that employs pre-dosed, vacuum-sealed reagent. The sample is drawn into the ampoule in small doses until a sharp endpoint color change signals the equivalence point has been reached. Quantitative test results are read directly from a scale printed on the side of the Titrets® ampoule.
Lastly, a ceric sulfate Go-No-Go test kit format is available upon request for situations where a Pass/Fail result at a specified control point is sufficient. A single, small dose of sample is added to a screw cap vial containing the hydrogen peroxide liquid reagent and endpoint indicator. An immediate color change occurs to signal that the hydrogen peroxide level in the sample is either above or below the specified control point.
Food processors must weigh analysis cost, turn-around time, accuracy, sensitivity and ease of use when determining which analytical sterilization test method suits their requirements. CHEMetrics hydrogen peroxide test kits, with their “snap and read” approach to sample analysis, fulfill each of these requirements with distinction.
A New Meter for Measuring Ammonia
To provide even more convenient water testing options, CHEMetrics now offers the A-2024 Single Analyte Meter (SAM) for the measurement of ammonia in water. The A-2024 SAM is an affordable portable ammonia photometer designed to work with the currently available K-1413 and K-1513 Ammonia Vacu-vials test kits.

Figure 1: The A-2024 SAM provides accurate and reliable results for ammonia water testing.
Whether you prefer testing with K-1413’s hydroxybenzyl alcohol chemistry or the Direct Nesslerization chemistry of K-1513, the new ammonia SAM is perfect for starting a new testing regime or integrating into your current schedule. Results are provided in ppm (mg/L) ammonia-nitrogen (NH3-N) on a clear screen. Featuring compatibility with two different methods, A-2024 can
measure at the following ranges:
- K-1413 Range: 0 – 3.00 ppm
- K-1413 Range: 0 – 60.0 ppm
- K-1513 Range: 0 – 10.0 ppm
- K-1513 Range: 0 – 150 ppm
The SAM fits comfortably in hand and runs on four AAA batteries for approximately 5,000 tests. It holds 15 data sets in memory making it perfect for testing in the field or in the lab. Every unit comes with a light shield, screwdriver, batteries, instructions and a 1-year warranty so you can test with confidence. CHEMetrics Vacu-vial test kits are sold separately so you can choose the product that best meets your testing needs.
You can purchase a unit right now on the AquaPhoenix website, by phone at 800.356.3072, or by email at our contact us page. (International customers: Please contact your local CHEMetrics distributors.)

CHEMetrics announces the release of a new Vacu-vials test kit which employs the Direct Nesslerization method to measure ammonia in drinking water, clean surface water, good-quality nitrified wastewater effluent, and seawater. The new K-1513 instrumental test kit offers an extended shelf-life advantage over the K-1503 and K-1523 Nessler ammonia Vacu-vials test kits (K-1503 and K-1523 were discontinued in Summer 2024). K-1513 is offered as an alternative to these kits when a longer shelf life is desirable and refrigerated storage is not an option. Table 1 provides shelf-life and other key product definition comparison information.
This test kit can be used to measure the concentration of ammonia in seawater by using the A-1503 Accessory Solution Pack sold separately.
The K-1513 Vacu-vials Ammonia Test Kit comes in a cardboard box and contains everything needed to perform 30 tests: thirty ampoules, Stabilizer Solution, 25 mL sample cup, 3-mL syringe, ampoule blank, and instructions. This kit requires the use of a CHEMetrics Direct-Readout Photometer or a spectrophotometer capable of accepting a 13 mm diameter round cell. Instrument sold separately.
| Table 1. CHEMetrics Direct Nesslerization Vacu-vials® Test Kit Comparison | |||
| Part # | Room Temperature Shelf-life (months) | Measurement Range (ppm NH3-N) | Analysis Time, min. |
| K-1513 (NEW) | 12 | 0 -10.00 & 0 – 150 | 2 |
| K-1503 | 2 | 0 – 7.00 | 2 |
| K-1523 | 2 | 0 – 14.0 | 2 |
Order your kit today on the AquaPhoenix online store or contact our customer service team for more information.

CHEMetrics announces the release of two new test kits employing the N-(1-Naphthyl)ethylenediamine (NED) method to measure nitrite in potable water, surface water, stormwater, groundwater, seawater and wastewater. With a reduced analysis time and improved measurement sensitivity, these new kits offer advantages over the existing CHEMetrics nitrite test kits which employ a different diazo dye reagent, based on chromotropic acid.
The NED method is widely used in the quantitative analysis of nitrite in water samples. Like our chromotropic acid reagent, NED readily undergoes a diazonium coupling reaction in the presence of nitrite to give a strongly colored pink azo compound. The intensity of the color is directly proportional to the concentration of nitrite in the sample. Due to the significant intensity of the developed color even at very low nitrite concentrations, we are now able to offer a low range comparator with the visual CHEMets® Kit. Likewise, the instrumental Vacu-vials® Kit provides a much lower limit of detection than our chromotropic acid kit offers. Additionally, the analysis time is reduced from 10 to 8 minutes.
We continue to offer the nitrite product line which employs the chromotropic acid reagent for customers who require measurement options for higher nitrite concentrations.
The two new CHEMetrics® NED nitrite in water analysis test kits include:
- Visual CHEMets® Kit, No. K-7006, ranges 0-0.1 & 0-1.0 ppm, and
- Instrumental Vacu-vials® Kit, No. K-7013, range 0-0.750 ppm. The Vacu-vials® Kit can be used in CHEMetrics® V-2000 or V-3000 Multi-Analyte Photometer or any spectrophotometer that accepts 13 mm round vials.
For more information about the nitrite (NED method) test kits call 800.356.3072, or email contact us today.